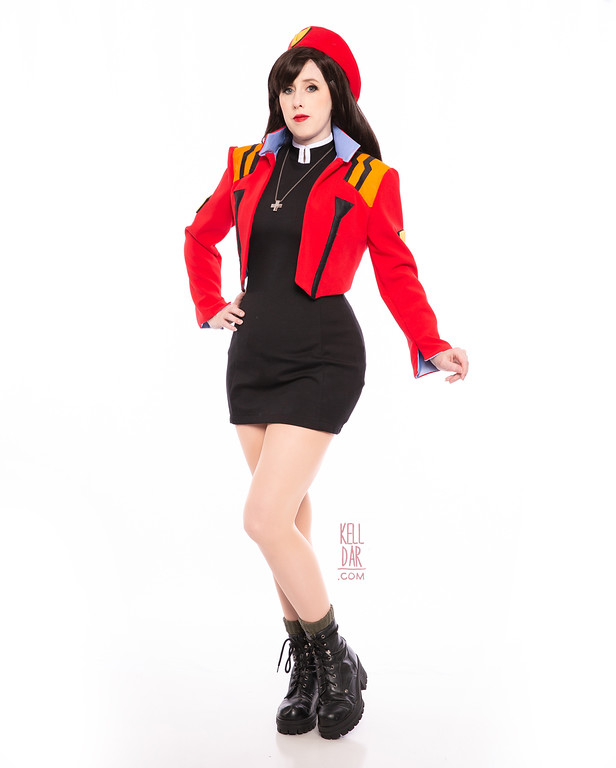
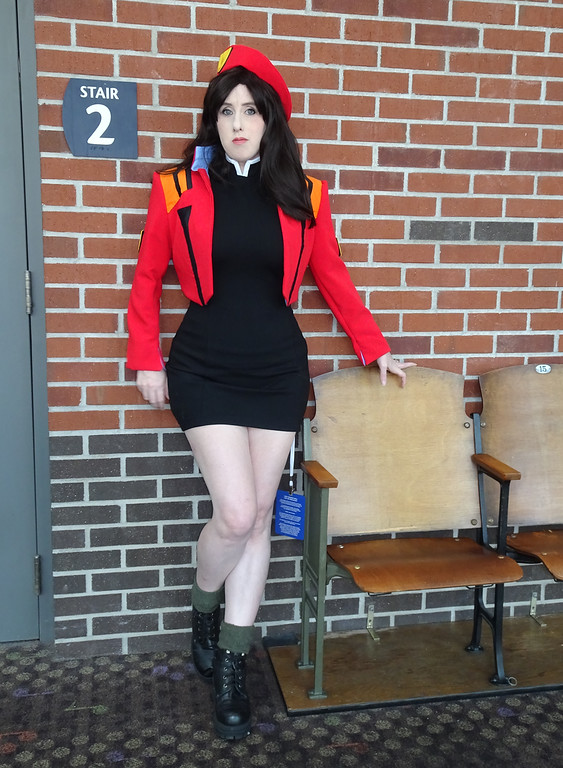
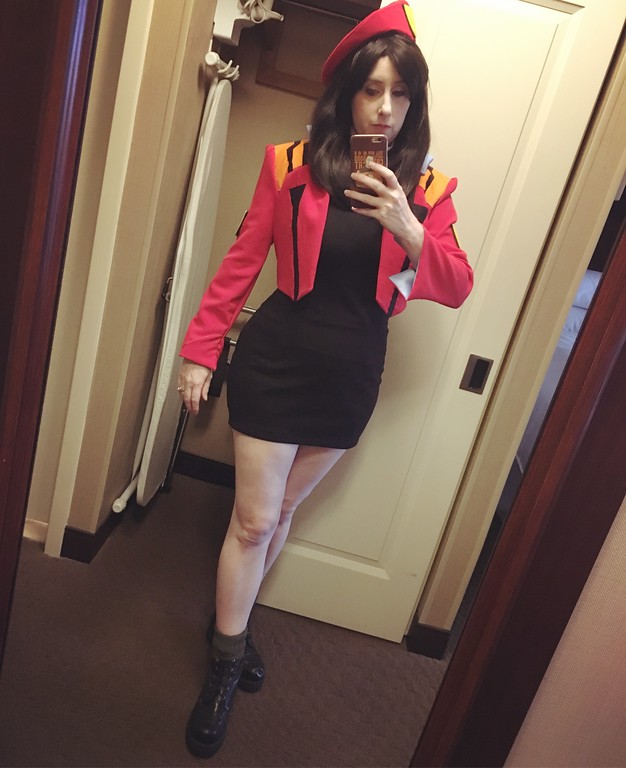
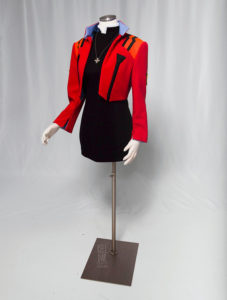
Misato
Source: Evangelion
Made for: Anime Blues Con 2019
Journal Entries: Read more at my Misato tag
Related Costumes: Misato 2002, Asuka Plugsuit
![]()
![]()
 Patterns Used:
Vogue V9264 (Dress), Vogue V8301 (Jacket)
Background:
Misato was one of my earliest costumes, made for Animazement in 2002. Ever since pulling that old costume out to get white backdrop shots a couple of years ago and discovering the vinyl was shedding, I’ve been playing around with the idea of remaking it. After Anime Blues Con 2018, I decided I’d make it for 2019 so I’d actually have an anime costume for once… but then kinda forgot about it. Two weeks before Anime Blues Con 2019, I decided I still wanted to make it LOL. A quick trip to Joann and had everything I needed and threw it together in just over a week.
Dress:
The fabric I got for the dress was a refined stretch ponte knit. I love how thick and stretchy this fabric is! I used it for several other projects since this one. I used the Vogue dress pattern I’d just used for jedi Leia a few weeks before, just altered to be shorter and fit through the hips more. Unfortunately I’d already managed to misplace the collar pattern piece, so I had to draft that on my own (wah). Originally I’d planned to trim the collar in white bias tape, but instead made my own trim out of leftover white milliskin so it would also stretch. I’d planned on having the dress have no closures and be pull-on… and while I COULD get it off and on, it was difficult, so I went back and added an invisible zipper in the back.

Jacket:
The jacket I made using the above Vogue jacket pattern – it was a great starting point for this. I just left off the lower section under the waist seam and the front button sections. I pinned the pattern up to create the point in the front. Originally I tried backing this red fabric with some taffeta and heat-n-bond, but that made it MUCH too stiff so I had to scrap that idea. Instead I flat-lined the red with some leftover blue cotton from Dolores and that worked much better.
I used a blue satin for the lining, though I used the wrong side – I created a facing of the red fabric for the lining on the front, though I forgot to do it for the collar! D’oh! By the time I realized I was too far gone to go back and redo it so I left it. The collar is the collar from the pattern, I just straightened the front edge of it instead of curving it. It is interfaced and the lining is handsewn in place.
For the details of the jacket, I used a black vinyl – though I used the wrong side. Originally I was going to use the “right” shiny side but I was liking the flat matte cartoony look of the jacket, so I went with the more dull “wrong” side. I made paper patterns for the front stripes and the shoulder pieces, then traced those onto my fabric to cut out the final pieces. The shoulder pieces are 2 layers of orange cotton with the black stripes hand-sewn on top. Once each piece was cut and finished, I hand-basted them into place on the jacket, then machine sewed them down in most places and removed the hand-sewing as necessary. There’s a few places I left it hand-sewn.

At this point I realized I should have waited and put the lining in later so the stitching of the outer elements wasn’t also going through the lining – but I’m calling that a victim to a one-week-build.
The yellow “patches” of the sleeves my husband helped me make of craft foam. He made a pattern and cut them out for me, and applied them to a vinyl backing so I could sew them in place. I painted them to give them a little more depth. I attached the sleeves last, sewing the “patches” on while I could lay the sleeves out flat, then sewing in the lining and then added the sleeves to the jacket.
Accessories:
The only other thing I made for this version was the hat; I started with finding an online tutorial for making a beret and made a mockup using those instructions. It turned out a little more “paris artist” beret than “military” beret, but it was close. I realized the shape of the lower band was the part that was causing it to look wrong, so I cut wedges into that section to widen it, pinning fabric in place to hold the shape. Then I disassembled the hat (keeping the pinned in wedges intact) and used those pieces to cut a new pattern. I interfaced both the band and the top of the hat, and the band is self-lined. Got the top sewn to the band, flipped, and this time it looked about right. I also added some small tubes of red spandex to the inside edge, so the hat could be bobbie-pinned in place.
The rest of the accessories (wig, shoes, socks, necklace) are from other costumes or the 2002 version. I decided to go with the natural black wig because I thought it looked better on me than my 17 year old blunt cut purple wig. LOL.
History:
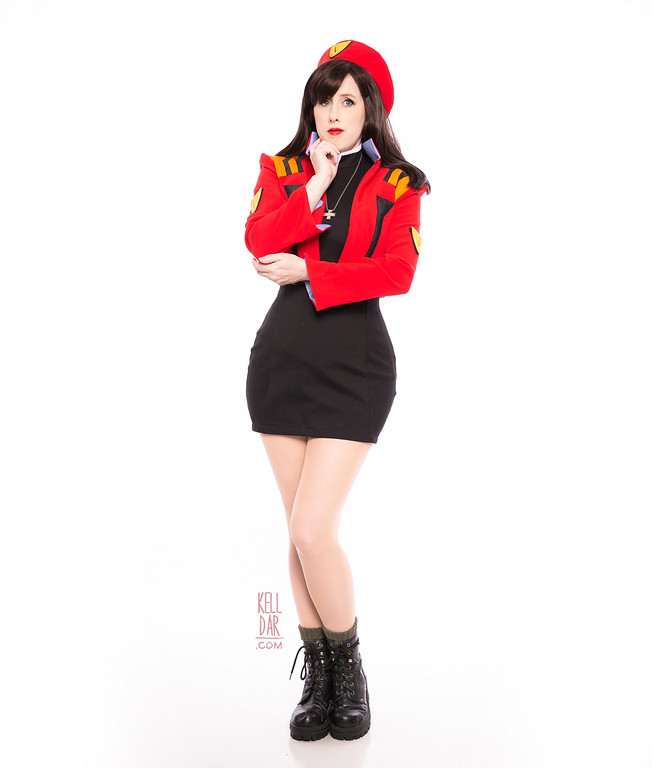
I finally got some nice photos of this on the white backdrop summer 2020. Funny thing is, I actually shot it twice… the first time I was ready to deal with the “no neck” problem I noticed from the 2019 photos. I just look like I have no neck in this costume, and I assumed it was an issue from the jacket collar and wig. So I made sure to keep them in place during our white backdrop photoshoot. Unfortunately when I got the photos back, I still had no neck! I realized it was a dress collar problem, so I took the collar off the dress, shortened it, and also took out some of the width from the front panel off the dress at the shoulder seams. It’s still not perfect but it was much better second time around.
![]()


 >
>


![]()


Please note that none of these costumes are for sale! This is my personal portfolio.