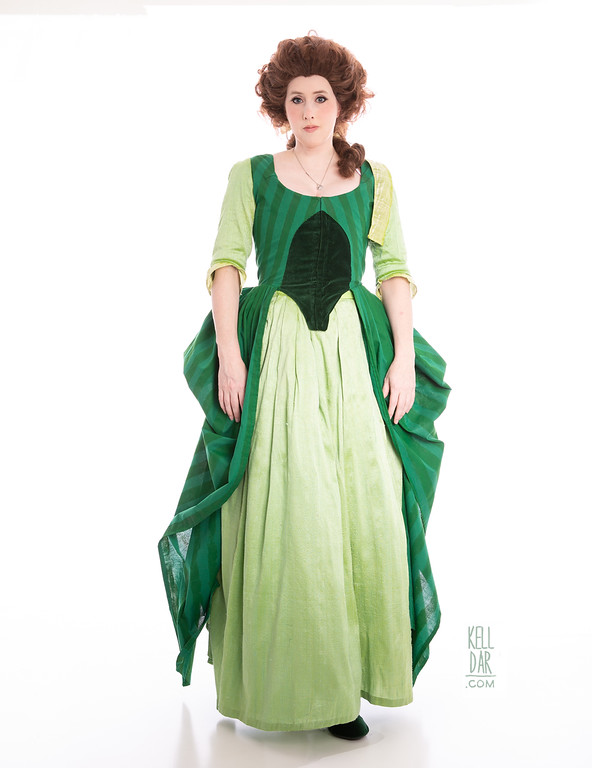
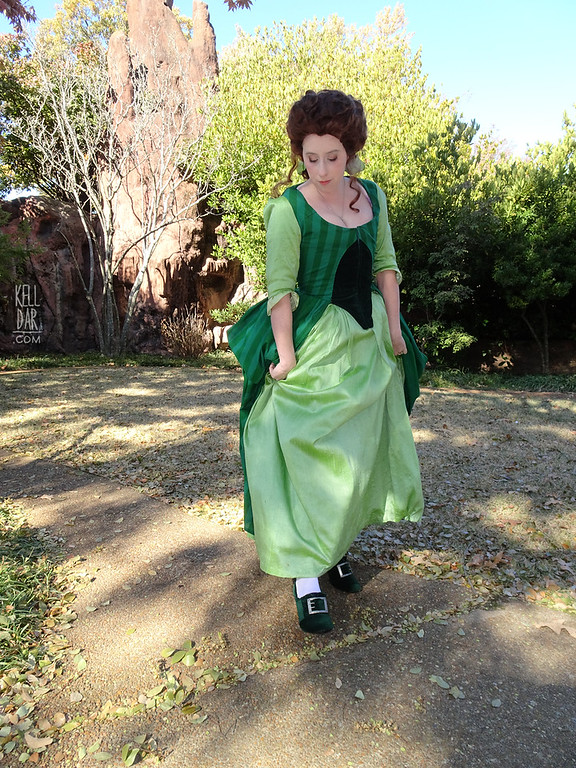
Belle’s Library Dress – Historical-Inspired
Source: Beauty and the Beast
Made for: MCFC 2019
Journal Entries: Read more at my 18thc Belle Library tag
Related Costumes: Pink 18th Century Dress, Belle’s Library Dress
![]()

![]()
 Patterns Used:
The American Duchess Guide to 18th Century Dressmaking (bum pad, underskirt), JP Ryan’s Robe à l’Anglaise pattern (dress), McCall’s M7642 (zone front pieces)
Fabric:
After Dragoncon 2018 I got obsessed with the idea of making a Robe à l’Anglaise with green-on-green stripes. That’s really all I wanted. Green stripes. I decided I could do it as a historical version of Belle’s library dress, to be a companion piece to the pink historical version I did of her “Something There” dress in 2015. I drew it up, started fabric shopping and… couldn’t find green on green stripes ANYWHERE. Literally months of searching and the only green-on-green I found was an ugly knit. It was so ugly I didn’t even keep the swatch and I usually keep all swatches LOL. I also tried dyeing a white-on-white stripe but the dye took differently to the sections so that wouldn’t work.
Meanwhile, I wanted a silk dupioni for the skirt, and I found a beautiful light spring green from one fabric store that was exactly what I had in mind. I ordered yardage, and when it arrived, it was a completely different colour than my swatch! The yardage was grey in comparison with the original swatch. I sent an email to the fabric store who said I’d been sent the wrong thing and they’d send me a return label. Then a couple of hours later they came back and said the dye lot had changed and they no longer had what they sent me of the swatch fabric. UGH.

After I got my money back, I went to Silk Baron and got a few swatches. None of them were quite right, but they reached out afterwards to see if I’d liked the swatches… and I told them the issue I’d had with the previous store, and they told me to mail them a piece of that swatch and they’d see what they could do about matching it! How awesome! A couple of weeks later I heard back with a couple of suggestions. I ordered yardage of one and it was beautiful! Super happy with Silk Baron!
So now that I had my skirt fabric… I packed it all away and didn’t look at it for several months LOL. Actually right after that we closed on our new house so then it was the scramble of moving and unpacking for a while.
False Rump:
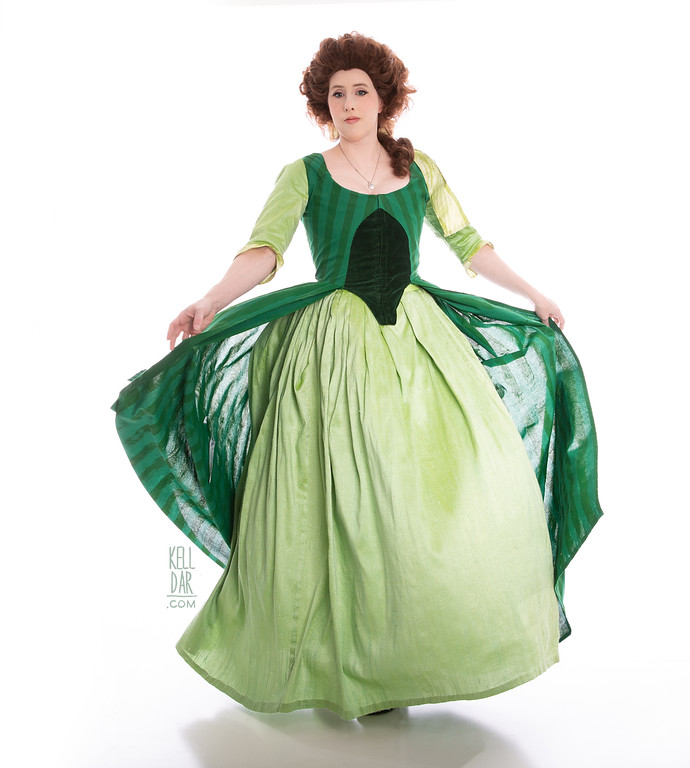
In April 2019 I finally got back to the project. First things first, I went and bought some cotton in a similar colour to the skirt fabric, and I built some bum pads using the pattern/guides from the American Duchess book above. They went together really easily, although I overstuffed them at first and had to open them back up and take some of the stuffing out. And I wasn’t sure about how they looked. They looked weird and I planned to come back to them later.
Skirt:
Got started on my skirt – using guides from the American Duchess book again. It’s 2 big panels pleated and finished at the top edge with a ribbon. I ended up doing a side hook and eye closure. Once I had that mostly done and the hem pinned up is when I felt like the bum pads looked so funny. With just the skirt it looked so SILLY!
Dress:
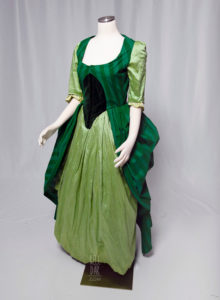
Next it was time to tackle the actual dress. Which I still didn’t have fabric for!! I decided to buy some plain cotton from Dharma, dye it a green that would work with the silk dupioni – and the dark green velveteen I’d bought for the front of the bodice. (I wanted velveteen as a nod back to my 2008 version of the dress.) After 3 non-successful dye jobs I gave up, tossed it in a pile, went to Joann with swatches of my velveteen and dupioni, and just picked out a green cotton. I don’t know why I didn’t do that in the first place.
I floundered a bit on how I wanted to tackle the dress, pattern-wise, as well. I knew I wanted a zone front but I couldn’t find much in the way of zone front patterns. Initially I was going to use McCalls M7642 (which for some reason I have 2 copies of), but after getting it cut, I decide to stop and think about it. I decided to go buy a copy of JP Ryan’s Robe à l’Anglaise pattern. Once that arrived, I decided to use that instead – but I used the zone front pattern pieces from the McCall’s pattern as a basis to do the zone front pieces on the front of the JP Ryan. It just helped get the shape the way I wanted and saved me the step of patterning it myself.
So I did a mock-up of some scrap lining first – it seemed to fit pretty well straight off the pattern, I just had to take the shoulder pieces up a bit. Then I cut out the bodice panels out of the green cotton (and the velveteen for the front pieces). Once I got them pinned together and on the form with the skirt… I realized I did not like the skirt colour with the cotton D: UGH! I had picked it out because it seemed to go ok! But the silk was too yellow. I took a photo of it and brought it into photoshop, played around with the tones… and realized dyeing the skirt (and what I had left for my sleeve fabric), was the best option. I hated doing it, because #1, I LOVED that spring green, and #2, putting it in water meant I lost the crispness of the dupioni. But I didn’t want to go buying new fabric AGAIN. So, I dyed it – a blue-ish green I already had on hand, with some straight up blue added to help correct the yellow-ness. It came out pretty close to my photoshop mock-up.

Now that that was fixed, it was back to the dress. But wait! What about my stripes?? I was on the fence about either finding a ribbon to just sew on (I’d need a lot of ribbon, and it would be yet another green I’d have to make sure worked with the existing greens), or painting them. I decided to go with paint as it seemed to be the most economical and stress-free (in terms of colour matching) option.
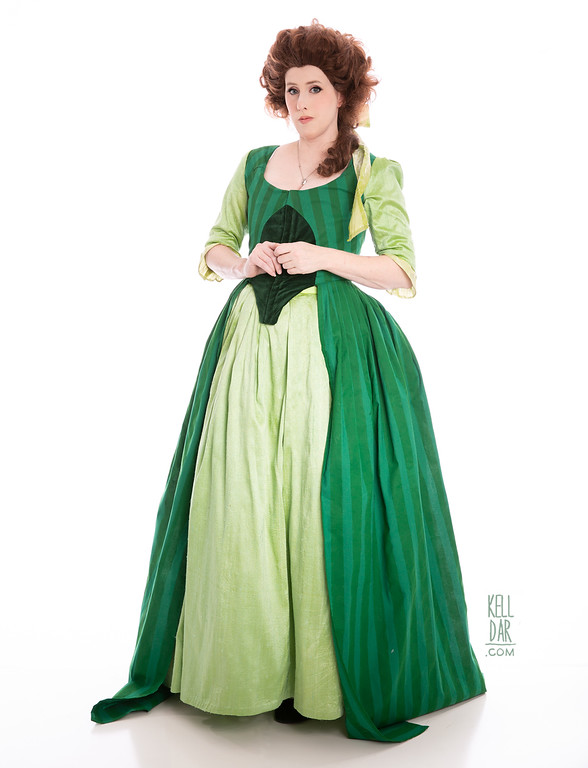
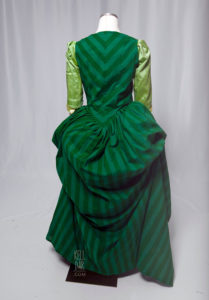
The first fabric paint I picked up at the craft store ended up being too dark and oddly blue toned. It was a dark green and once painted on one of my panels, looked like navy blue. Thankfully I had plenty of extra cotton, so I cut a new front panel and started over – this time I found a bottle of my old Jacquard textile paint I’d used for the 2015 pink Belle skirt – it was a green I’d lightened to do paint the leaves on the underskirt. It ended up being perfect. I used masking tape to lay out my stripes, painted the panels on on a piece of cardboard to make sure it didn’t get on my table. When I got to the back panels, I pinned the front and back panels together, laid them out, and got the masking tape put on the back panels while everything was pinned, so the stripes would match up. Then I carefully unpinned everything, laid out my back panels and pressed the tape down. It worked OK… they’re a little off but pretty close.

Once I had that done, it was time for the skirt panels… and they took forever and used a LOT of paint. I think I ended up buying 6 more jars of the paint? I bought 2 on amazon before remembering my local art store carries it, so I bought them out (and they were cheaper than amazon!). The biggest problem I had was with my cardboard table… the paint would dry and stick the fabric to it. When I peeled off the bodice pieces, they were small enough that I could pull slowly and work my hand underneath it to make sure no cardboard came up with it. But the bigger skirt panels were a pain. I ended up with scraps of torn cardboard stuck all over the interior! I had to go back through and wet those spots and carefully scrap off the cardboard with my fingernails. I had little bits of damp cardboard everywhere. Ew.
Anyway, now that everything was painted, I started assembly. First, I got the front edge of the “zone front” section pressed down and hand-tacked it into place onto the velveteen front panels. I used my original mock up I’d done in lining fabric as the lining, and it worked well. I put 2 pieces of boning in the back lining, and then 2 at both front edges.
For the front closure I used some black hook-and-eye tape I bought off amazon – but the hooks and eyes were spaced too far apart. I pinned it in and tried it on and I had gaping in between each set. So I cut up some of the excess and sewed new hooks/eyes on in between each set, halving the distance between them. I got it basted in and tried on – I ended up having to move one section back a bit further but once that was done, I got them sewn in my hand.

Next up I got the skirt sections pleated and sewn onto the bodice, and then it was time for sleeves. I used the JP Ryan sleeve pattern and my silk dupioni – I’d dyed what was left of my fabric with the skirt. I lined the sleeves with some of the cotton from the bum pads. Originally, I was going to include a sleeve cap, which you can see in my drawing reference – I tried it out on one of the sleeves and it was too heavy looking, so I dropped the idea. For the ruffle at the bottom edge, I didn’t really want anything super floofy looking – my goal here was for a bit more “casual” look than the pink dress had been. I cut the JP Ryan pattern for the sleeve flounce and cut some of the excess off – so it still has a LITTLE floof but not too much. For that flounce bit, I used some of the excess fabric I’d cut off the hem of the skirt prior to dyeing – so it’s still the original pre-dyed dupioni colour.
Once those were assembled I got them basted in, then machine-sewn in. Last little bit was to put in bustle lines… I used some scrap ribbon, sewn onto the interior side of the skirt, and snaps at the waistline it can connect to.
And once the dress was done the bum pads looked fine, not near so silly LOL. I got the skirt hemmed by hand based on my height of the shoes I’d gotten – which were a bit taller than I would have liked but oh well.

Shoes:
I guess I need to talk about the shoes, huh? I found this air of shoes at the secondhand store, $10. They were super cute, fit well, and I liked the shape a lot. Only thing was the heel was too high. But I decided to let that slide because they fit everything else I wanted. Originally, I was going to paint the shiny parts white and cover the rest in my scrap green velveteen. But after painting those sections without much success, I realized the white was going to look shocking with the rest of the costume. So I scrapped that idea and decided I’d cover those sections in leftover dupioni. After a mockup of that I realized that also looked weird – and everything I was trying to do was coming across more 20s than 1700s. So I decided let’s just cover the whole shoe in the green velveteen and use the dupioni for accents.
I started out by making a mock-up of cotton, just laying the shoe on my fabric, tracing around the shoe, cutting it out and pinning it together around the shoe. I tweaked the shape and fit a bit and then transferred that pattern to my velveteen. It went through a few more changes even after that as I worked getting the pieces to fit the shoe – I recut the pieces several times and somehow that one yard of velveteen worked for my bodice panels AND multiple shoe pattern pieces. I ended up copying the seaming of the shoe – two “lapels” at the front, the seam along the front toe. I used some scrap black vinyl as a “sole” for the front bottom. One I had the pieces sewn together, I fit them around the shoe, pinning them in place, and sewing the back seam closed by hand. Then I folded the edge of the fabric down over the foot opening and sewed it in place, and along the front of the “lapel” pieces. And finished the edge at the heel opening, as well.

I was going to do a stripe of the dupioni around the foot opening, but after getting one mostly sewn on, did an instagram poll on whether I should continue, because I wasn’t feeling it. The poll came back 100% no stripe so I took the one I’d mostly finished off.
I had tried to find a buckle option for the shoes that I could just sew on a faux buckle on the front, but everything local was too garish for the looking I was going for, or the wrong look. I ended up splurging on some American Duchess buckles. Since I hadn’t planned on having functioning buckle on the front, I ended up just making a strap of my velveteen to run through it, then tacked it onto the shoe. Ta-da.
Wig:
Wig was my 2015 Belle wig – though it worked ok for the pink gown with the flower crown, overall I really wasn’t happy with the look of it for this costume – I think I may restyle it AGAIN (6th time??) into the hedgehog style for future wearings with this. I made the bow out of leftover dupioni. The corset I wear under it is the pink one I made that goes with the 2015 pink gown, and I just wore a plain petticoat under everything, and some white stockings.
History:
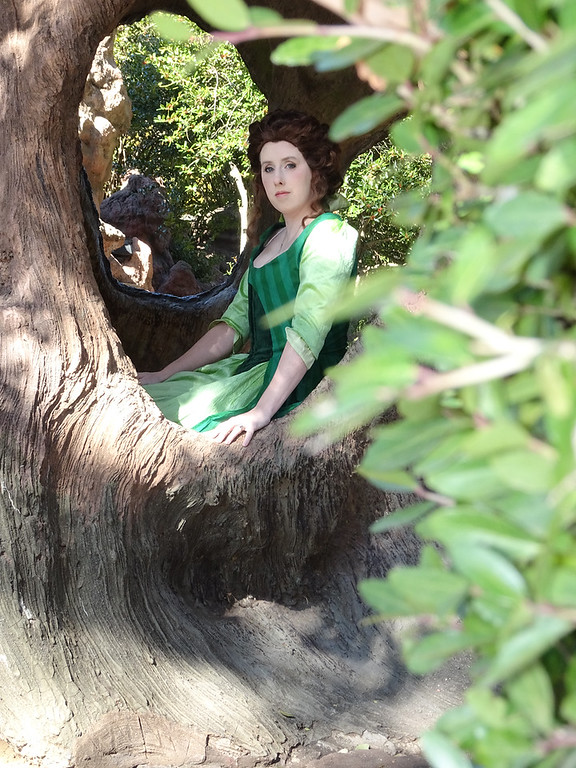
I did get to wear this out once – to MCFC 2019. I had intended to take it with me to Dragoncon in 2020, but of course that didn’t happen, and by the time Dragoncon 2021 rolled around I had too much other newer stuff I wanted to take, so this one has just been hanging in my closet ever since. Anybody want to plan a historical costuming picnic? LOL
![]()


![]()


Please note that none of these costumes are for sale! This is my personal portfolio.