Donna Noble – The Unicorn and the Wasp
Source: Doctor Who
Made for: Dragon Con 2015
Journal Entries: Read more at my Donna Unicorn tag
Related Costumes: Runaway Bride Donna, Time Lord, Journey’s End Donna, Silence in the Library Donna
![]()
![]()
(Patterns Used: None)
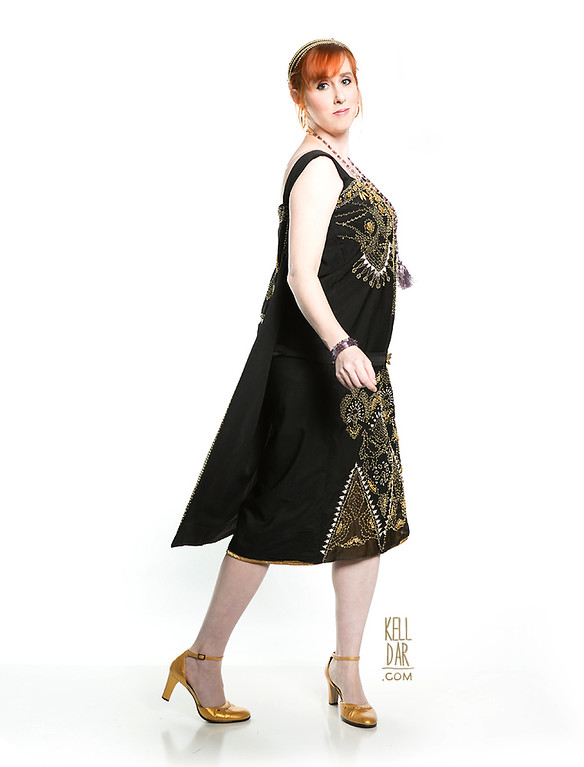
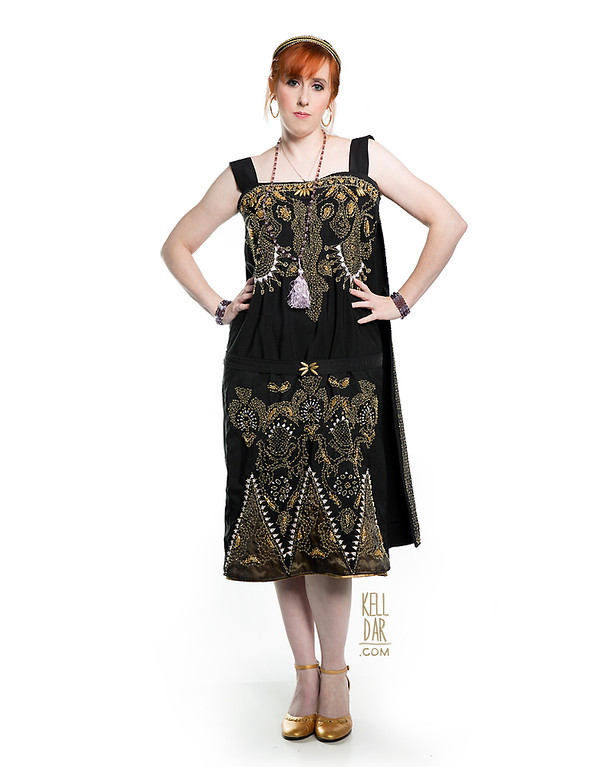
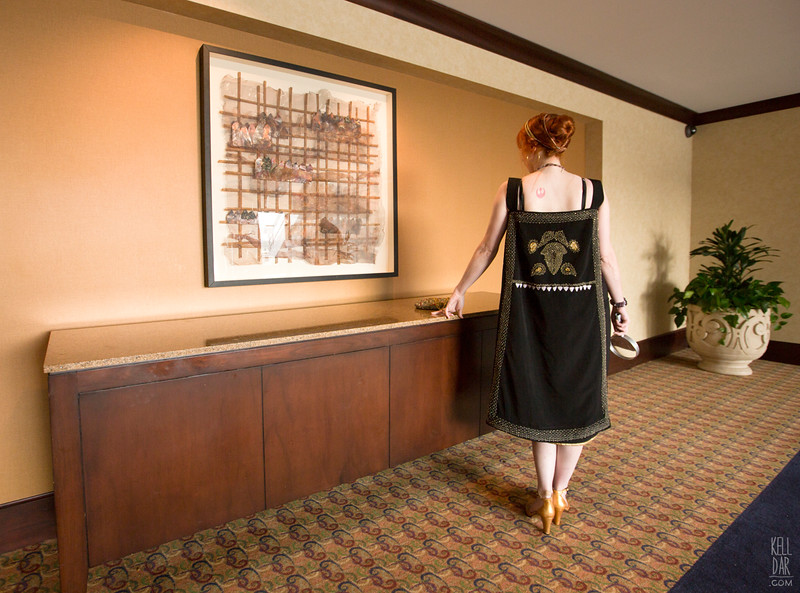
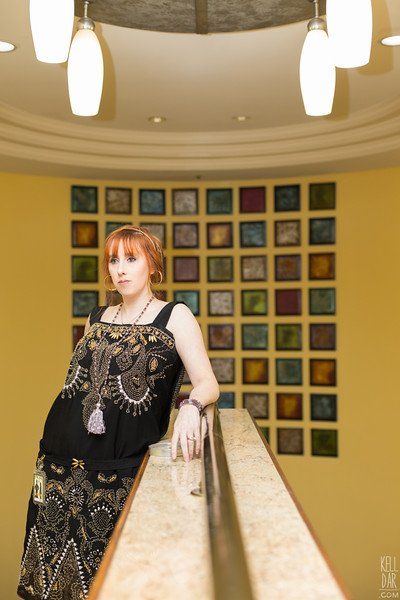
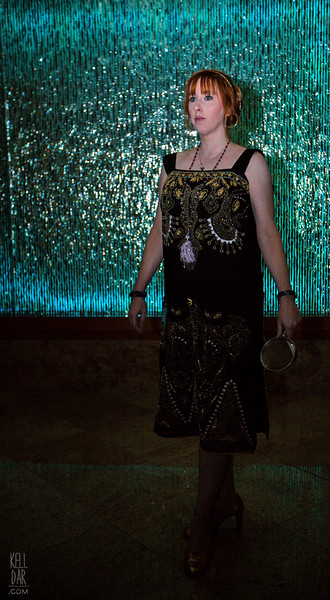
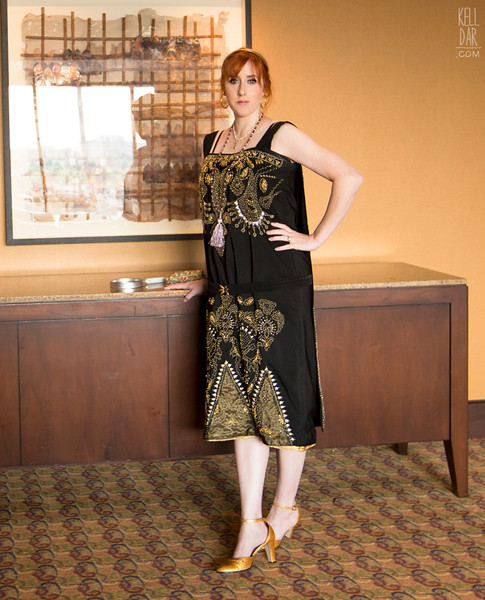
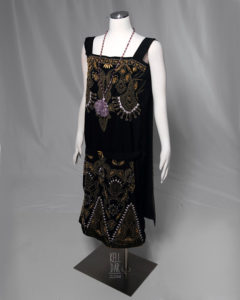
Dress:
I actually started on this in 2014. I bought all my supplies (fabric, beads, embroidery floss) and dug in. Come early August, as I was staring at only about 1/100th of the embroidery/beading I’d done, I realized I was not happy with it and there was no way I was going to finish it for Dragoncon. So I set it aside, made Donna Fires of Pompeii instead, and thought to myself, “I’m never going to pick that up again.” (see: Bespin Leia from 2006 I say I’m going to finish every single year.)
Well in May 2015 I got called for jury duty. My brain immediately filled with images of myself sitting doing nothing for a week in a juror’s room like last time I had jury duty — or worse, getting put on some kind of sequestered trial for weeks. I dug around for a project I could easily take with me, and decided I’d tackle this costume again (of course, then I found out I couldn’t take needles or scissors with me, so there went that idea – but thankfully I was only there a day before getting dismissed!)
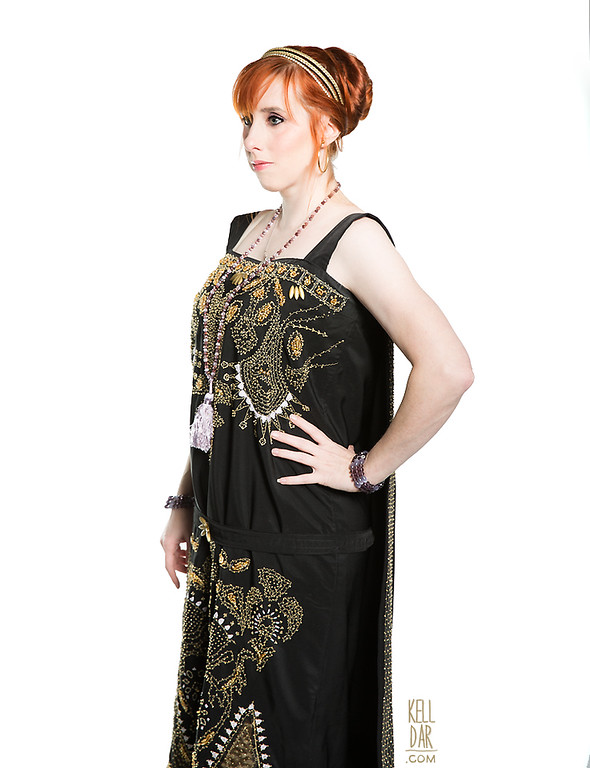
I started over from scratch and recut the dress panels again (basically just big rectangles). I printed every decent screencap I could find, and from those I drew out the designs in photoshop and printed them full size, then used that as a reference to trace the designs on with a gold paint pen. (I turned our glass top coffee table into a light table!). I found a serpentine stitch on one of machines I really liked, and I did the majority of the basic stitching using this, just following my gold paint pen lines.

I broke the front design up into 3 sections – top, bottom, and triangles. The triangles were the large 3 gold triangles at the bottom. I did each one at a time. After I’d get the machine stitching done on a section, I’d go through and bead it, do any embroidery embellishments needed (I hated those lavender triangles!) and then repeat the process on the next segment.
I actually got really fast at it. I finished the front part of the dress in just over a month, maybe about a month and half. I’m fairly certain all of this beading was done on a separate organza layer on the original, since you can see the gold fabric under layer in parts, especially in the large triangles at the bottom. I didn’t want to do it that way, so instead I made the large triangles as appliques with gold taffeta, black organza (both left over from other projects) and attached them separately – then did my stitching and beading and embroidery on top. Got the front dress panel piece attached to the back piece, lined, and added the straps.
For the cape, I used what was left of my black peach skin fabric, drew up a new design (there weren’t a lot of references for the back. I took some of the front elements and arranged them in a way I liked. I simplified it a bit – hers has a little more going on – but I needed to get it finished at that point.), and stitched/beaded/embroidered. I lined that and sewed it onto the back of the dress. I ended up having to take a small seam across it to make it lay right but it’s not terribly noticeable. (I think you can tell that, by this point, I was kinda over it.)

Jewelry:
Had a hard time finding beads I liked for the necklace. Finally settled on some purple beads from Michael’s, and I bought the lavender tassel online (I misunderstood the description and ended up with 6 of them. Only needed 1. Oops. Anybody need one?). I reused my Silence in the Library bracelets and my Journey’s End earrings.
Shoes/Accessories:
I picked up these heels at the second hand store last year. Thankfully they hadn’t gotten stuck in a box and lost in the interim, they were still sitting in a bag in my sewing room! I repainted them gold. Unfortunately they are possibly the second most uncomfortable costume shoes I’ve ever worn, the entire inside is covered in moleskin to try to ward off blisters. Which sucks because otherwise this costume is SO comfy! I’ve got to replace them one of these days. The clutch is one that belonged to my grandmother, and the fan was given to me by my other grandmother. I ended up buying, like 4 different headbands for this project – I ended up using two of them, and adding an additional chain of rhinestones to the end of one to wrap into my hairbun.
History:
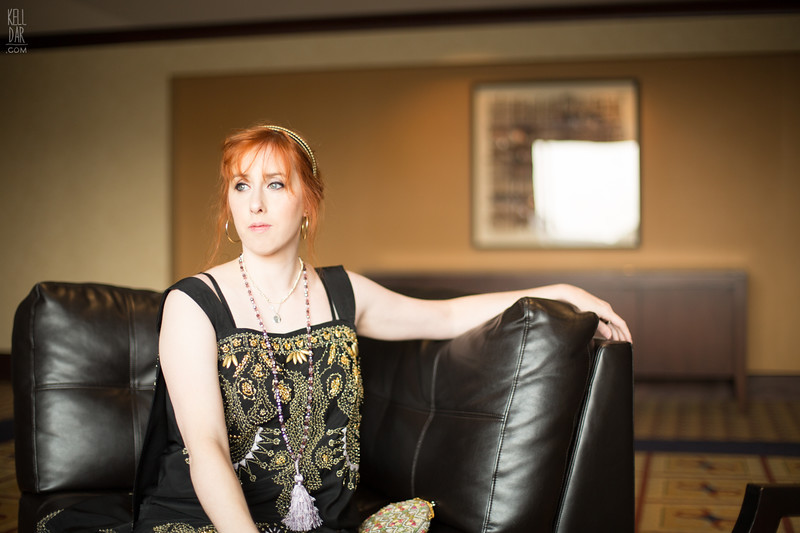
I am so happy with how this turned out! It’s nice to have a Donna costume that feels “costume-y” and not like normal clothes. As of 2025 I’ve worn this a LOT and it’s held up well.
![]()


![]()


Please note that none of these costumes are for sale! This is my personal portfolio.