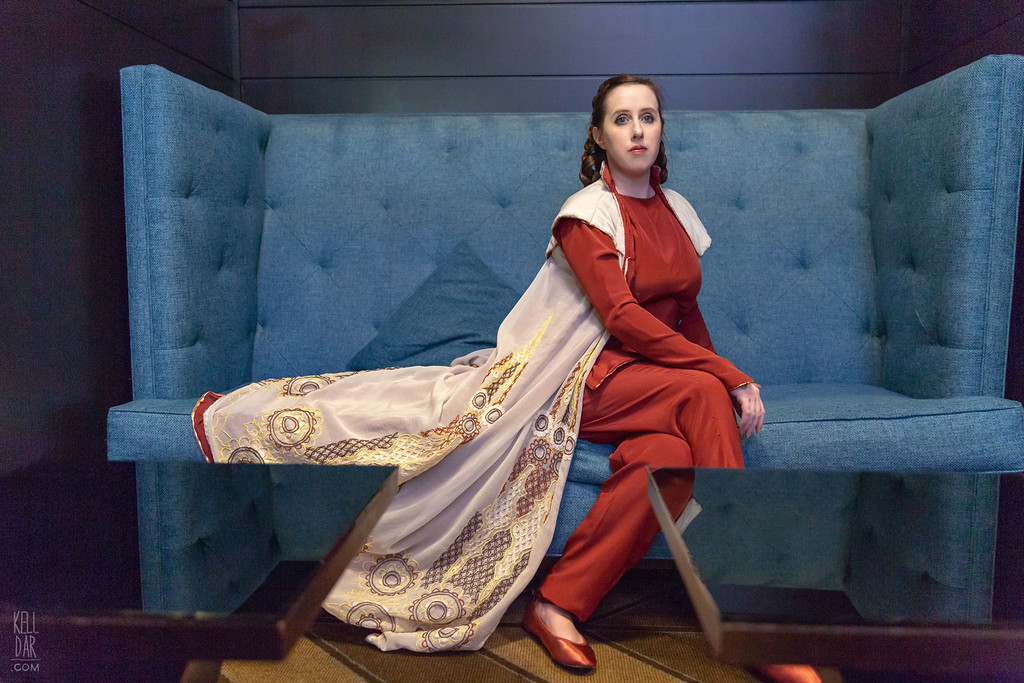
Princess Leia – Bespin Outfit
Made for: Star Wars Celebration 2017
Journal Entries: Read more at my BespinLeia tag
Related Costumes: Dapper Bespin Leia, Hoth Leia
![]()
![]()
 Patterns Used:
Simplicity 8253 (Tunic – modified), Simplicity 1165 (Pants – modified)
2006/2016:
So I first bought fabric for this in 2006. I bought an off-white/natural polyester chiffon and a burgundy poly chiffon. Several times throughout 2006 and 2007 I got pieces pinned together and pleated but that’s as far as I ever got.
Every year on my “year in review” I’d say I want to finally finish Bespin Leia this year! This went on for 10 years and finally in 2016 I decided enough was enough, it’s time to finally do this thing. I decided not to use the polyester chiffon for the outside of the cape and instead found a natural crinkle silk chiffon. Now that you have some history I can dig into the rest…
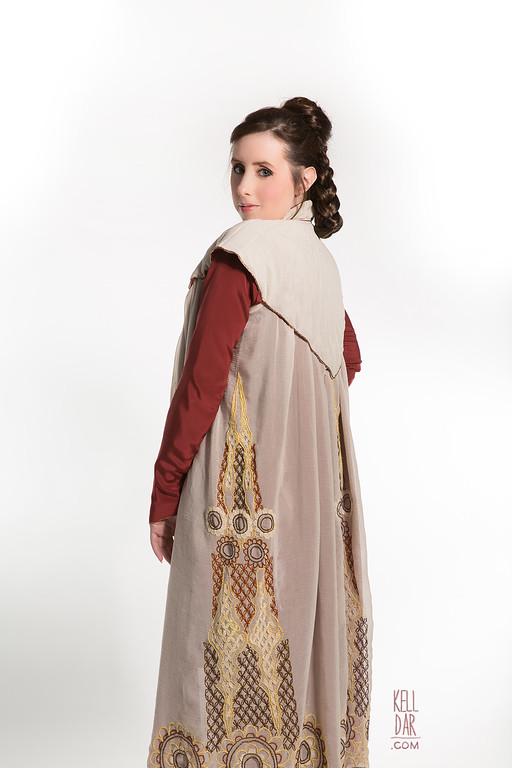
Embroidery:
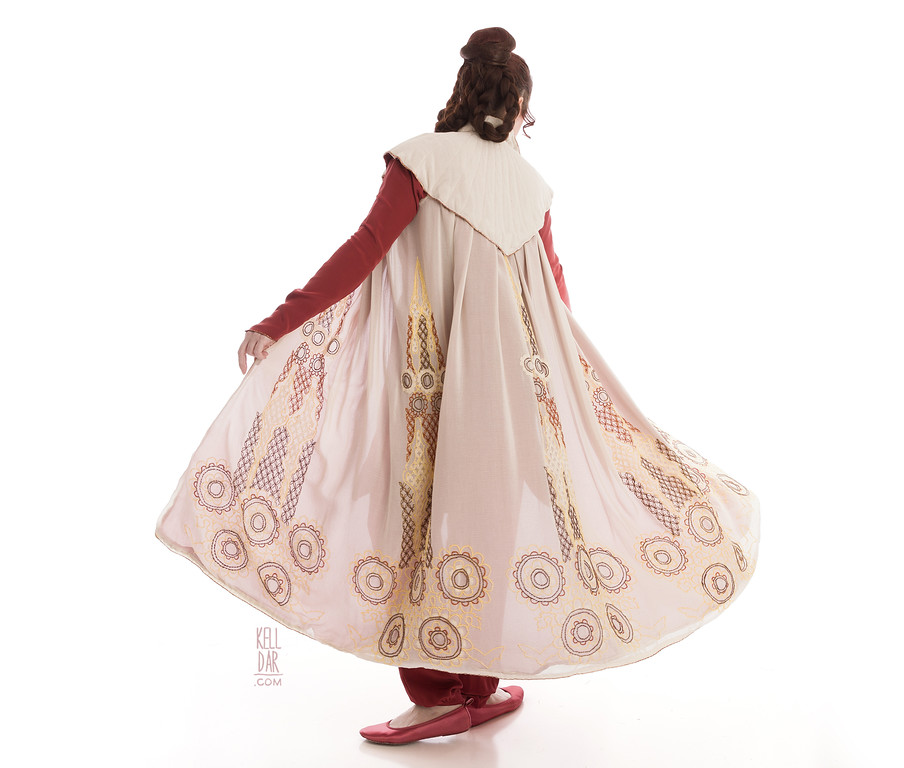
I drew out the design of the spire in Photoshop, mostly using the exhibit photos from Padawan’s Guide as a reference. At the end of the day I realized it was a tiiiiny bit small, I should have probably gone up and out another inch or two. I printed out a full size version, taped it to my kitchen floor, and traced the design onto my fabric using yellow, brown and grey pens — yellow for the yellow segments, brown for the red and brown, and grey for the white. Each one took about an hour to transfer.
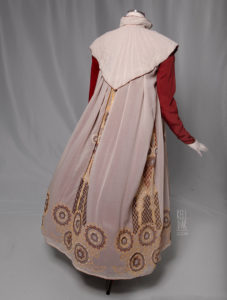
I started playing with embroidery… and had the horrible realization that some of my elements didn’t look right. Mostly the little “birds” or “Xs” were wrong. I knew I wouldn’t be happy if I left it. The pen was not removeable. So I’d just wasted my very expensive fabric and was going to have to start over from scratch. THANKFULLY I’d bought extra fabric and had JUST enough to do a new one. I redid my design, reprinted it, retraced it (this time just in grey and yellow – yellow was easier to see so I did it on my side spires as my “testing grounds” and grey on my “hero panels” – the two front ones and the center back. I wish I’d done them all in grey now but thankfully the yellow isn’t too visible.)
I used dark brown, deep red, yellow and off-white embroidery floss. I’d initially gotten plain white for the white segments and it was just TOO white. A natural or off-white looked much better. It took me a while to get into the groove of doing the stitching but once I did it looked ok. The most time consuming part was the shadow-stitching on the petals and inverse Xs inside the yellow spires.
All together the embroidery took between January 6th and March 17th, and that was spending pretty much every free minute working on it. I took a few days off work to concentrate solely on it, and when I didn’t, I took it to work with me to work on over my lunch hour. For a while I really questioned if I would finish it, but I did start to get faster towards the end, thankfully.

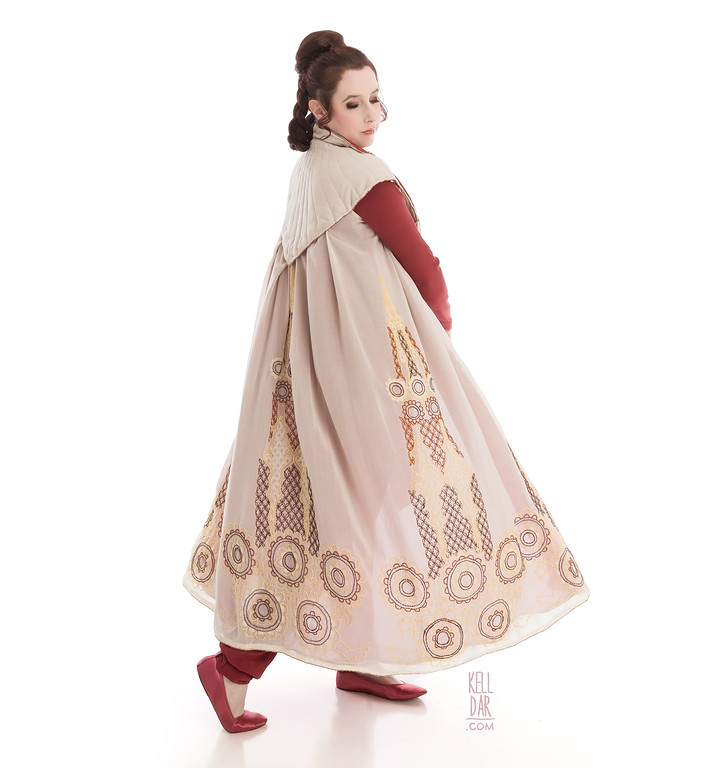
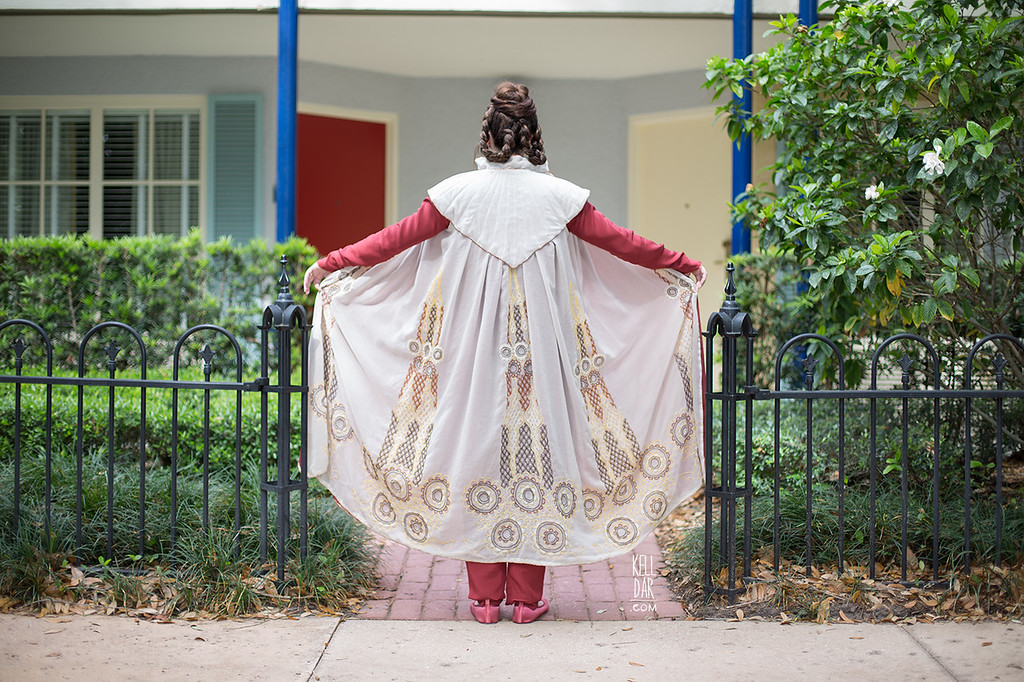
Cape:
THIS was honestly the hardest part of the whole thing – not the embroidery, that was just slow. The hardest part was cutting into that embroidered fabric after spending all that time on it!!
Initially I was going to go ahead and use the original 2006 burgundy chiffon for the lining, but towards the end I decided not to. I bought 3 yds of silk chiffon from dharma and dyed it to match my tunic fabric. I got it sewn onto the embroidered piece at the sides and top. I had some issues with the sides – the two front embroidered panels had slightly stretched out the chiffon and were causing it to not lay correctly. I was able to help it out with some stabilizer and a good pressing but it’s still a little wonky.
The yoke was a pain in the butt – I made 3 versions, and the last one was the very last bit of my crinkle silk chiffon (and they don’t carry it anymore!) so I had to make that one work. The first one was too small. The second one I used the old polyester burgundy chiffon from 2006 as the lining…. and once I got the yoke turned right side out, i discovered that that old, cheap poly chiffon was disintegrating everywhere it was stitched!! Ugh! So version 3 used leftover of my tunic fabric as the lining. I actually liked the way version 2 looked better, but at least version 3 won’t tear apart.
I added the collar to the yoke, and then sewed the metallic trim on. Then hand-sewed the cape piece into the inside of the yoke. I used some metallic gold ribbon to finish the edge of the red lining part, and then sewed the metallic trim all around the edges of the cape.

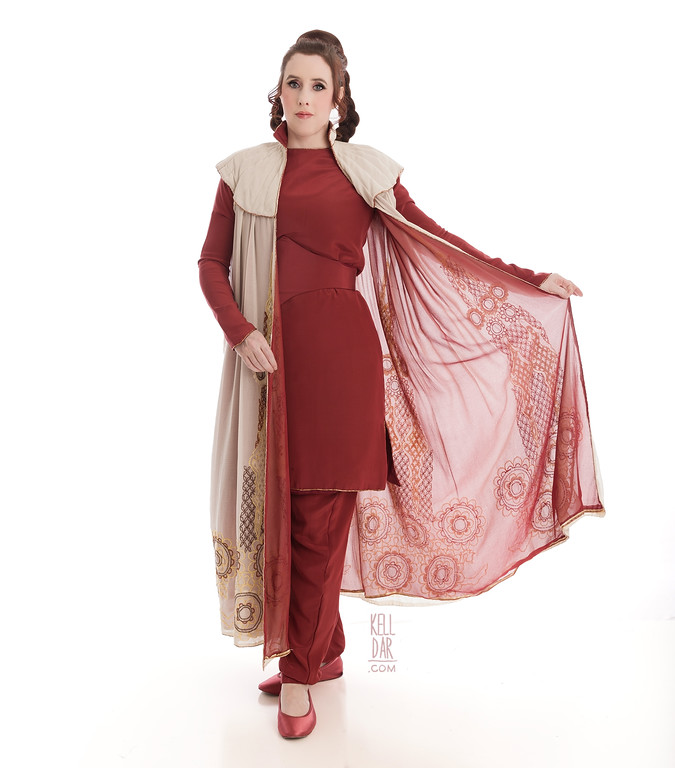
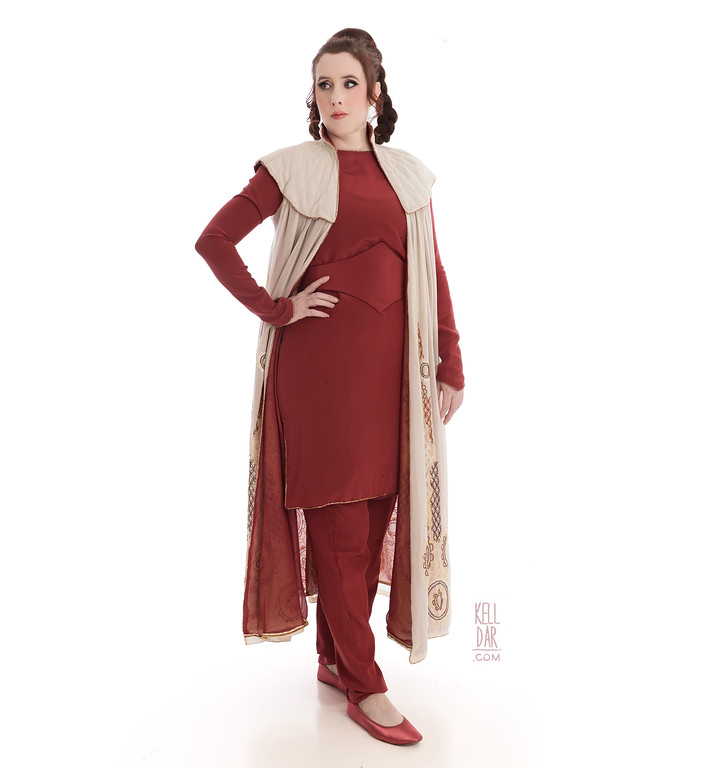
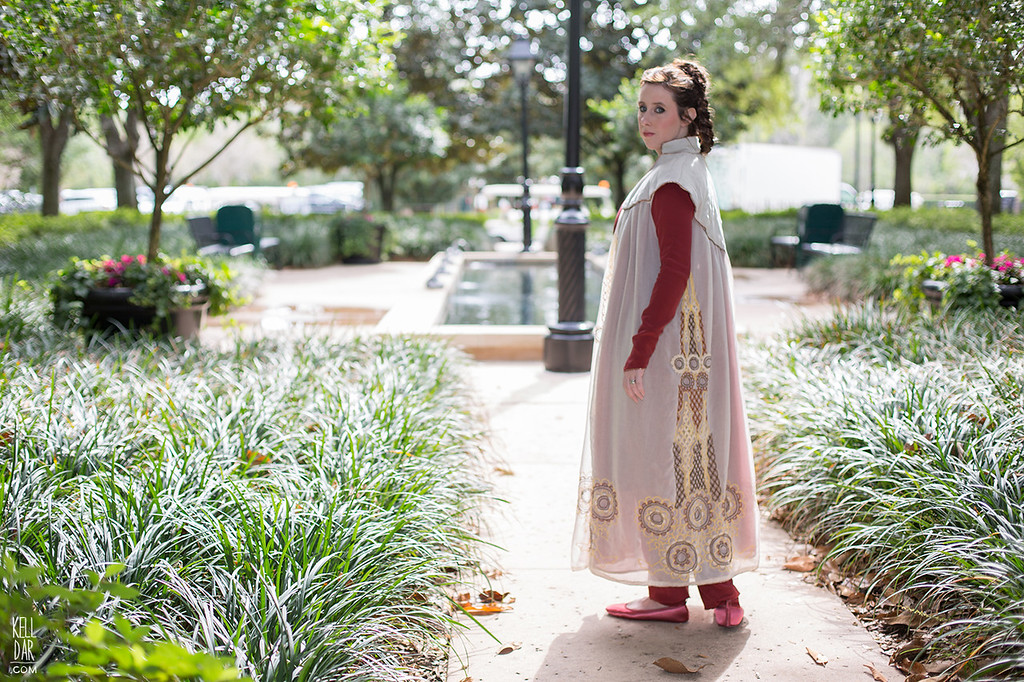
Tunic and Pants:
For these I got a silk crepe de chine (thanks to a gift card my parents got for me for christmas!). I didn’t want to mess up this expensive fabric so I got a lining material in a similar colour to do mock-ups on — also used it to line the top and the belt.
I used a 60s dress pattern to make the tunic, just changing the length, lengthening the sleeves and removing the bust darts. Like I said I decided to line it with the mock-up. Then I sewed the metallic trim along the bottom, neck and sleeve openings.
The pants I used the pants pattern above, just widening them a little at the ankle and adding the cuffs. They have pockets! Yay! This was a fairly easy pattern and worked well for this, although I’d say if you use it, get a little bit wider elastic for the wasitband than what the pattern calls for.
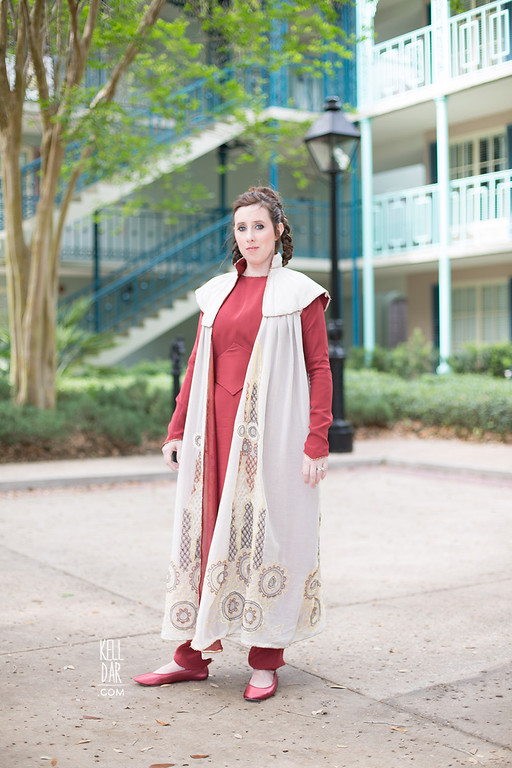
Belt and Shoes:
For the belt I wanted to do a leather base. I picked up a cheap piece of leather at Tandy — a piece of cowbelly, which is the exact same thing I’ve used for all of my other Leia belts so I might as well stay consistent. I made a mock-up using some felt, used that as a pattern for Chase to cut my leather, then cut the shape out of my crepe de chine (for the front side) and my lining (for the back side). I got them sewn together and then was able to roll the leather belt piece up small enough to just roll it right back into the fabric tube. I handsewed the ends closed, and sewed on some snap tape for a closure. I very quickly realized the snap tape wasn’t doing a very good job, so I added a big 1in snap on there, too.

The shoes were brand Touch-Ups “Beth.” I read that they ran small and narrow so I got a half size up. When they came they seemed too big! But after I dyed them they tightened up and now they are a little snug on my feet — so if you use these definitely do go that size up. It took about 5 coats of dye to get them about right, and I could’ve probably done one more but I was tired of doing it at that point!
History:
So glad to finally have this done. After wearing it, I think I need to tweak the cape attachment to the yoke a little in the front, and shorten the tunic a bit. I might also redo the hem of the inner cape lining. But otherwise pretty happy with it.
(2025 Addendum: So yeah after wearing this at Celebration and doing the first white backdrop shoot, I did go back and shorten the tunic, it was definitely too long, and also monkeyed with the way the cape was attached to the yoke. I’d love to replace the cheap gold ribbon I used on the inner cape lining hem one of these days, but I’m not too pressed to do that. Overall, I’m still really happy with this costume and it’s still one of my favs.)
![]()


![]()


Please note that none of these costumes are for sale! This is my personal portfolio.