Princess Leia – Bespin Dapper Day Dress
Made for: Disney Trip 2019
Journal Entries: Read more at my Disneybound Bespin Leia tag
Related Costumes: Dapper Day Leia, Bespin Leia
![]()
![]()
 Patterns Used:
Butterick B6094
Background:
As I said above, I’d wanted to do this in December 2018. I ordered some fabric but that was about it – I just had too many other projects converging at once and I didn’t have time to do anything on it. I’d picked out the pattern above, and, originally, my plan had been to do the embroidered chiffon as an overlay on the skirt, with it also visible on the lining of the flipped out panels on the upper back. But that all got changed as I actually got to work on it in 2019 – because my husband & I were going to be celebrating our anniversary at Victoria and Albert’s on our April 2019 trip, so it was perfect for that!
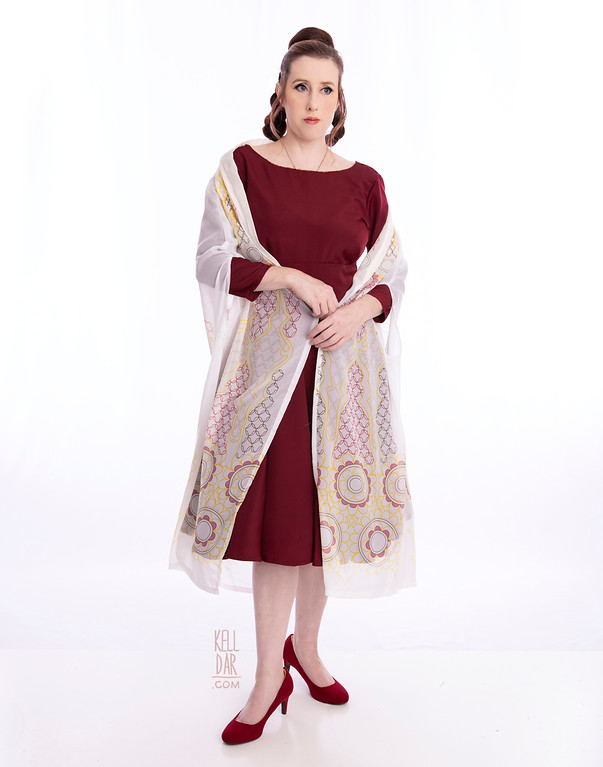
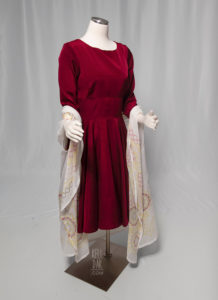
Dress:
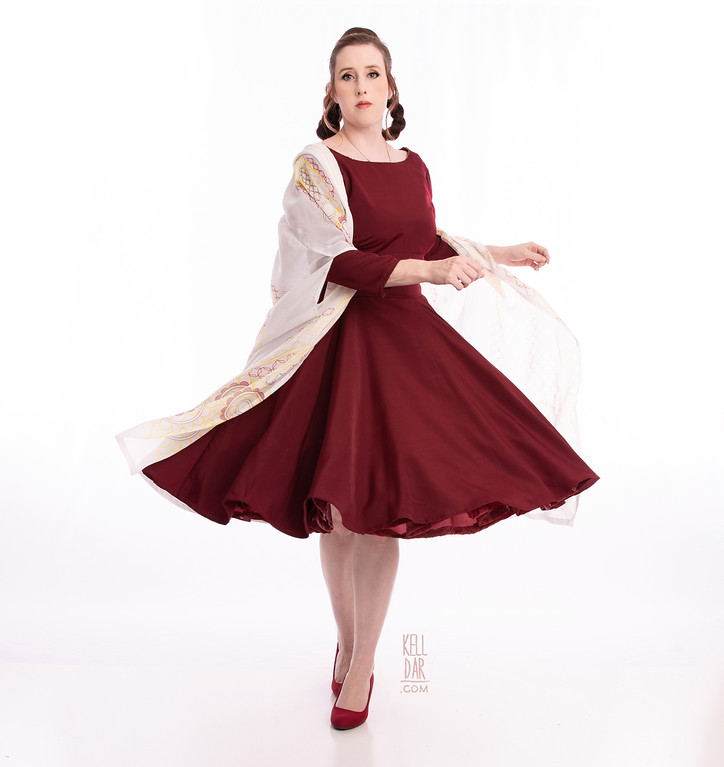
So I’d bought some dark red taffeta in 2018 to maybe use for this. Once it arrived, it looked SUPER cheap and gross LOL. So I knew I was going to have to find something else. But, the Butterick pattern has a built in slip/petticoat, and the taffeta ended up being exactly the right amount to make that part. So I started with that while I fabric-hunted for the actual fabric.
The petticoat was actually a giant pain in the butt, for some reason. I got the slip cut and put together, and the ruffles made and hemmed – but getting them sewn onto the slip was the big issue. Everytime I put it through the machine, my slip fabric would end up getting pinched and sewn on wrong – the first time, when I pulled it off the machine and looked at it, I was like… WTF happened. It had gotten pinched in like up to 5 inches at some points – almost the entire circumference of the darn thing! So I had to sit there and pick the whole thing out – and then re-pin the ruffles on, and try again. And guess what – it happened AGAIN. So this time I took the ruffles off, gathered them and sewed the gathers in place (so I wasn’t doing it as I was attaching it to the slip), and then VERY CAREFULLY got them attached to the slip – going super slow to make sure nothing got pinched under the foot. This time it turned it out ok – but my slip has a gazillion crazy tiny holes all over it from the previous attempts. LOL.

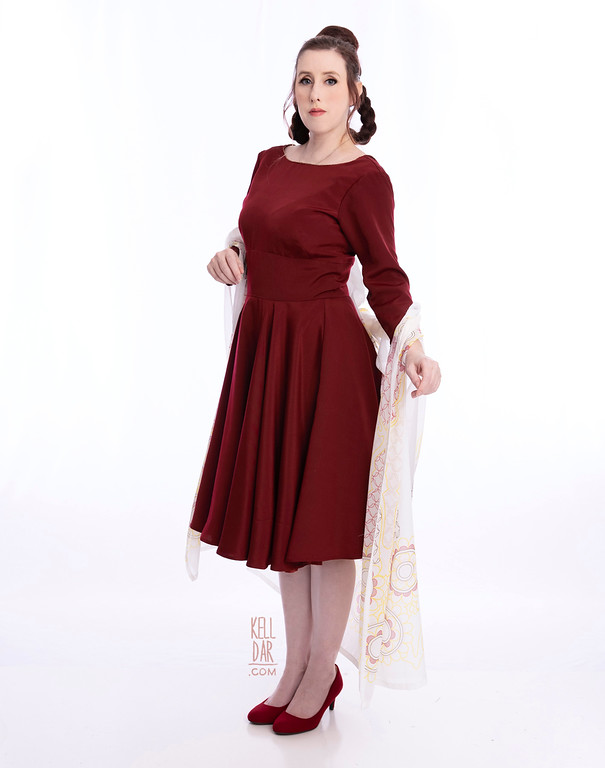
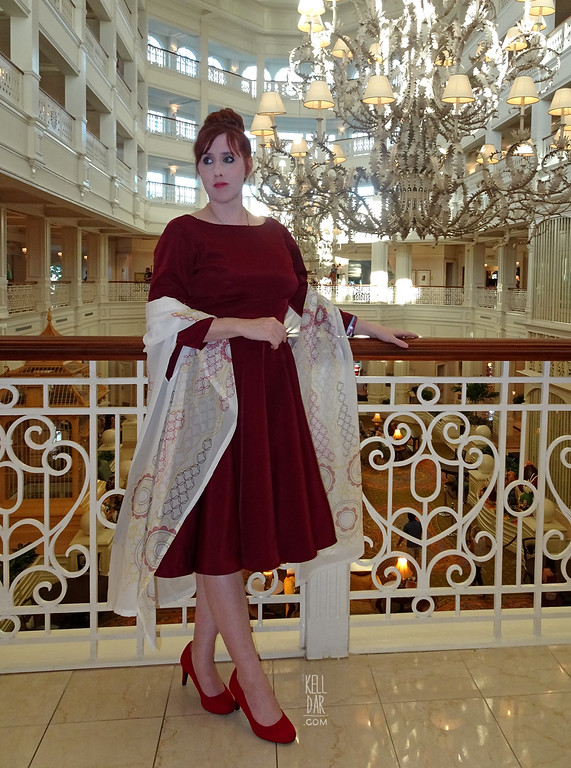
So for the actual fabric I settled on a wine-coloured peachskin. I did NOT want to use silk charmeuse for a dress I’d be wearing to Disney World (even if I wasn’t going to be wearing it into the parks). I wanted something hardier, and less expensive. I’ve used peachskin for other things before, and I liked the sheen and drape of it for a cheap alternative that still looked fairly luxe. I was REALLY happy with how this looks compared to the silk charmeuse of my actual Bespin Leia – it’s pretty close! Just thicker and easier to clean/manage.
So I used the Butterick pattern above and really didn’t deviate it from it all (I did eliminate the 3rd lining layer that would show on the back folded out sections, since I’d decided not to do that – more on that in a bit). I got the top and skirt assembled, and then, I wanted to add 3/4 sleeves to it, so I got those cut. It was at this point when I had just finished the shoulder seams of the bodice and was pinning in the sleeves that I tried it and realized – it doesn’t fit. ARGH.
The problem was in the bust darts and the seamline that sits under the bust. While it “technically” should have fit me, and my dressform was set to my measurements and it looked fine there – my bust is fuller, and it was pulling the seamline up to where it was sitting about a half-inch/inch too high, and the bust darts were also moved up a bit too high. At that point I’d already trimmed my seams and had no excess to let it out.

So, I had to buy some more fabric and start over on the bodice! I made an entirely new bodice – adding some height to the front bodice piece. I got the outer layer pinned together and padded out my dressform so it would be closer to my own shape, and then got the new pieces worked down to fit better. Did the same to the lining. Assembly of the second bodice went pretty quickly, since I’d already done it once before. And it fit MUCH better this time around!
So once that was done, I decided to go ahead and level the skirt and hem it – I finished it by hand, and then got the skirt attached to the bodice. Once it was all assembled, I noticed my petticoat ruffles were peeking out a bit much in a few spots (likely not sewn on even thanks to the constant wrestling LOL), so I took up the hem there a bit again.
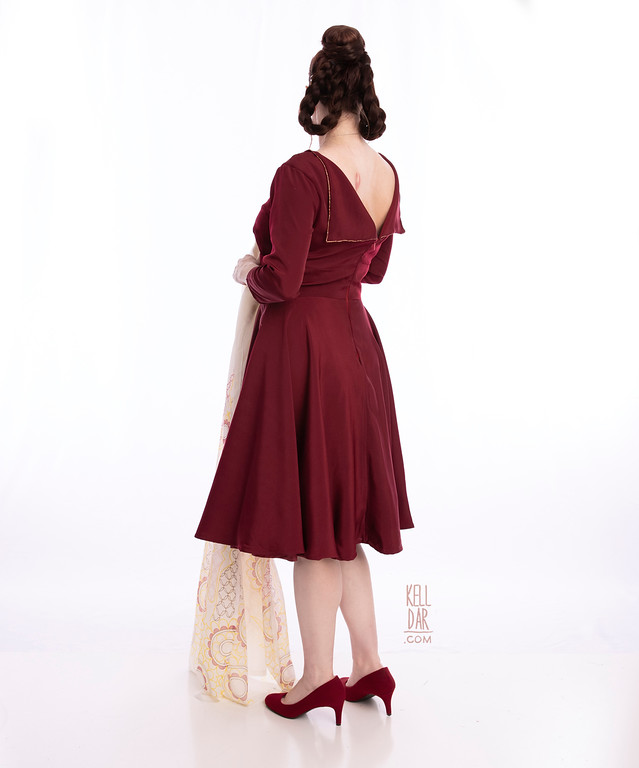
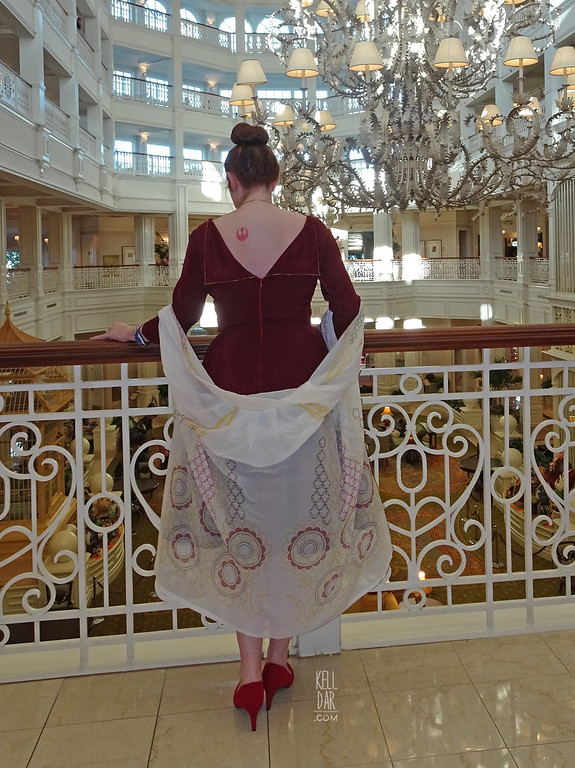
The back has an invisible zipper closure, and unfortunately my store didn’t have any dark red invisible zippers in a workable length. So I just went with red. I may go back and paint it later. Once it was all basically done, I added some of my leftover copper metallic trim (from my actual Bespin Leia) to the neckline and back folded out panels. The pattern called for the folded out panels to be sewn down with a button, but I liked the look of them hanging free – though I may go back and tack them down now that I’ve worn it. The slightest breeze moved them out of place.

Shawl:
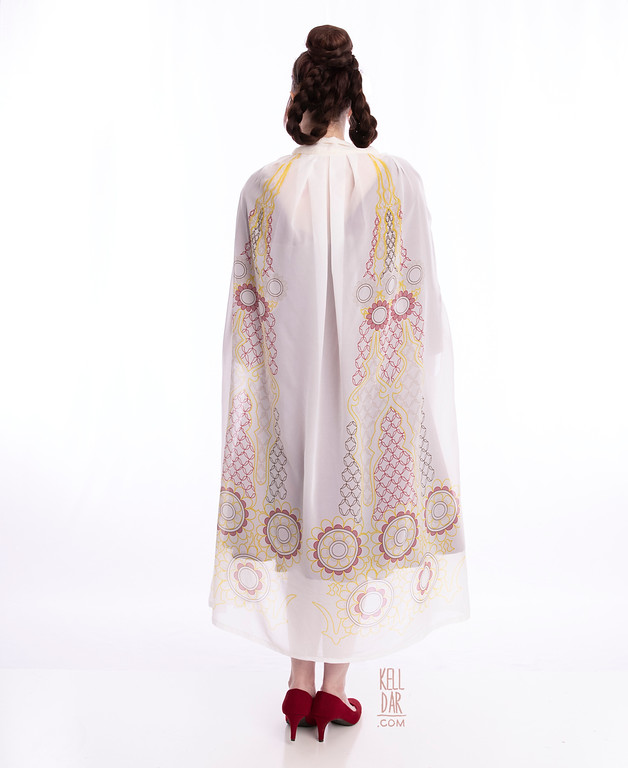
So as I mentioned, originally I wanted to do the embroidered section as an overlay on the skirt, and on the folded out panels’ lining. I got 2 yards of General_Leah’s bespin-inspired chiffon fabric from spoonflower to use for that – since obviously I did NOT want to (or have time to!) do all new embroidered panels LOL. But once I pinned the chiffon onto the skirt, about halfway through dress assembly… I hated how it looked. It just weighed the whole thing down.
So, I decided to go ahead and finish the dress in just the red fabric, and do something else with the chiffon.
In the end I decided a shrug would work best. I went through two “sort-of” mockups before cutting my actual chiffon. The first was more of a “proof of concept” than a mock-up – I had some fabric I’d picked up at Joann’s that I wanted to make a long boho-shawl/shrug thing out of. It wasn’t the same amount of fabric, but I worked out the way I wanted to do the shoulder/arm seams and armholes on that, and then moved onto my mockup.
I had some scrap fabric I cut into the same length I had of my chiffon, and then basically put that together the way I was thinking I’d do the shawl. It was a lot of trial and error because I really didn’t have a solid concept in my head at first. But eventually I got it to where it was “close enough” that I felt comfortable cutting the chiffon. I cut the excess length off the top to use for my collar piece, and then went ahead and hemmed the remaining large square for the body of the shawl. The large square had 4 repeats of the design on it, so I decided I’d have 2 in the front and 2 in the back.

I took that excess I cut off the top and worked it into a shape for a collar that would sort of evoke the yoke of the actual Bespin cape. I backed it into some plain poly chiffon I had in my stash, then draped it over my dressform and pinned the large square in place on it, figuring out where my pleats would be (mostly in the back), and where my shoulder dart needed to be. Once I had that figured out, I followed the guides from my first shawl and the mock-up, and added the long dart/seam along the shoulder and down the arm to create the curved shape to fit over the shoulders, ending in armholes near the hips. Then I got the pleats sewn in place, and got it sewn onto the collar.
The collar piece ended up being a little too big – which ended up being a blessing in disguise. I was able to fold it over once, sandwiching the raw edges of the top of the chiffon in between, and it looked like what I wanted in the first place.
I wanted to add the copper trim to this as well but just didn’t have time, so maybe I’ll add that later.
Accessories:
I wanted to wear heels instead of my Bespin flats. So I bought these on amazon and they came a little brighter red than I expected. So I decided to paint them, since I had a ton of fabric paint I could mix up and use. I waited until the week before we left to do anything with them tho, and the saturday before our trip, I ended up falling down the stairs at home and landing right on my right forearm. So by the time I got around to finally painting these, my sore arm DID NOT like the repetitive motions of painting this fabric paint onto the shoes (I like to use a tight circulation motion when applying fabric paint).  I did the best I could, thought they looked ok, left them to dry overnight and… the next morning I went to check them and it looked like I’d walked through mud and let it dry on the shoes in big, caked-on segments LOL. Good grief. So not knowing what else to do and not wanting to cake more paint on, I took them downstairs and just rinsed them off in the sink. And somehow, someway, every bit of paint came off. They looked brand new when they dried. So, thankful for that, I just left them the way they were.
Extra! Ears:
When I couldn’t put this together in time for our December 2018 trip, I made some Bespin Leia ears to wear instead. I had intended to also wear these with the dress eventually, but it really didn’t fit the tone of Victoria and Albert’s LOL. I used all leftover material from my Bespin Leia (silk chiffon for the ears, embroidery floss, silk charmeuse for the bow), just adding in craft foam for the shape and buying a red headband. I scaled down the round floral element from the embroidery, traced it onto some of the scrap silk chiffon, and embroidered it over a couple of nights. Backed it in some more leftover chiffon and fitted the craft foam inserts inside. Got those sewn onto the headband and then added the bow I’d made of the silk (with some batting inside for poof). Nobody “got” they were Leia ears at the parks, but since we went at Christmas, they were kinda Christmas-y, so it’s all good.
![]()


![]()


Please note that none of these costumes are for sale! This is my personal portfolio.