
FAQ Friday: Princess Leia Hair Buns – Method #2
(2025 addendum: this method is no longer what I use to do the buns. Head to my Bun Tutorial page for some more up-to-date videos on how I do the buns now.)
I’ve had this FAQ written for AGES but never could find the time to add the photos. One day it posted by mistake, sans photos, so I deleted it.
I finally uploaded the photos so I figured I’d better write it again and post it this time!
And this is only part one — it shows you ONE way I do my Leia buns – and it’s not my “normal” way. This method (which I call the “donut method”) was a quick, easy and cheap way for me to quickly do some Leia buns with what I had on hand – since my old extensions don’t match my hair anymore. Next week I’ll be posting a second tutorial with my “tried and true” method (aka the “cinnamon bun method”).
My notes for all of these Leia tutorials:
-It’s been a long time since I actively studied these hairstyles – most of my Leia costumes I did 2005-2007ish. I don’t claim them to be 100% accurate then or now! These are just for showing the way I have personally done them.
-There are always other ways of doing these hairstyles, so as always I urge you to research and experiment to see what works best for you! Especially for the classic buns – I’ve seen girls who have made clip on buns, styled wigs, bought and updated pre-made wigs, etc. There’s a lot of different methods out there you can experiment with.
Things you will need (for this method):
Brush – one for your own hair and one that will also work on wig/synthetic hair.
Wig spray – if you are using synthetic hairpieces, use this to soften/detangle your hairpieces.
Hairbands – multiple!
Bobbie Pins – I use 4 different kinds. Some large ones to anchor down important places, medium sized ones for the bulk of the work, small ones for the outer edges, and curved ones to hold my bangs in place.
Hairpieces – for this method I used 1 18″ loose hair extension (“braiding” hair) per side, which you will see below. I later used 2 per side.
2 Sock Buns – I only use these for this method. If you don’t want to use sock buns, keep an eye out for my 2nd post with my other method.
Hairspray – Optional but helps keep everything in place when you’re done.
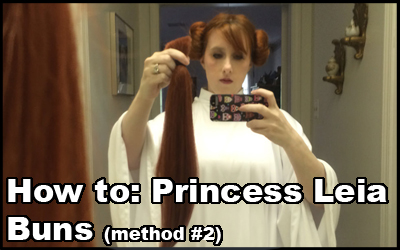
Step 1
Get your dress on first if it doesn’t fit over your head easily! I also do my makeup first, but if I forget to put the dress on before the buns, it’s hard to get it on without messing them up.
Step 2
Ok, so just so you know what I’m working with – I have decently long hair, and it’s pretty fine. This method works really well for thin hair, and can work with hair shorter than mine as well.


I center part my hair, as best I can, and put my hair into two low pigtails, right above my ears.

Step 3
I get my hair a little damp – I just wet a washcloth and run it over my hair. It helps everything hold together better (and, when you take your hair down, you get pretty waves!). Now we’re ready to sock bun.
I made my own sock buns, but you can buy them as well. I took a pair of thin black socks, cut the toe off and rolled them up into little donut shapes. I stitched the edges down so they wouldn’t unroll.

Step 4
I put the end of one pigtail through the sock bun, then wrap the edges of my hair around and back up underneath it. This is honestly the hardest part, especially if you’ve never done it before. But you don’t have to get it all tucked in the first time. Next, you’re going to ROLL the bun, basically flipping it inside out. This will make your hair roll up into it. HERE is a really nice visual tutorial on youtube for a basic sock bun, if you’re like me and need to SEE somebody doing it, rather than explaining.

Step 5
With each flip of the sock bun, you can tuck the edges that have come loose into it as you go. With each flip I also PULL it back out away from my head, to tighten it up. In this picture you can see I’ve got it nearly rolled up to my head.

Step 6
And now here it is all rolled up. It’s actually really secure just rolled all the way up to the end, but throw in a couple of bobbie pins to help secure it to your head; without it being pinned down, the donut can sometimes get pushed out away from your head when you put the extensions on and look weird.
Repeat on the other side.

Step 7
Now I’ve got two cute baby Leia buns, and while they’re not bad, I need a little more. For this next step, I have two pieces of loose synthetic hair, with each end tied off with a hairband, and the edges tucked back into the hairband so there’s no hair sticking outward.


And now it was at this point I realized I was going to be late to my event, so I shirked taking the pictures I should have. So I’ll do my best to explain. (See my Method 2 — it’s the same basic idea at this point on.)
I tuck one end of the loose hair under my sock bun, at the back of my head, and pin in place. Then I lightly twist the hair as I roll it around the top of my sock bun, pinning as I go. I tuck the other end underneath as well, once I get to the end, and pin it in place.
Step 8
Repeat on the other side – then rearrange, retwist, and tighten as needed. I usually take a couple of pictures of myself on my phone to see how even the two buns are, and make adjustments.
Step 9
Pin your bangs back – if you haven’t got them you don’t have to worry about this step, obviously 🙂

Now these aren’t the best they’ve ever looked – I realized I was making myself late for my event taking tutorial photos and got a little sloppy trying to hurry up LOL. My outer layer should have been a little bit more tightly twisted. But, it takes some practice and some playing around with it. The thing I like about this method is that, if you have long hair, it’s fairly cheap – a pair of socks, some bobbie pins and hairbands, and 2 loose pieces of synthetic hair (cost around $12-$15). And you can change the size of the sock buns by using thicker or thinner socks!
DECEMBER 2015 UPDATE!
I’ve recently been using this method more, but using 4 18″ extensions (2 per side) around each donut bun instead of just one per side like the above pictures! (And the best thing is, my new extensions actually match!)

I started out with the donut sock-buns on either side, then twisted two 18″ extensions around each one, pinning them as I went. They turned out pretty well!
Visit my other Leia hair tutorials: ANH Leia Method #1 (Cinnamon Bun Method), ANH Leia Method #2 (Donut Method), Ceremonial Leia, Bespin Leia, Slave Leia, Hoth Leia, and Rebel/Endor Gear.
