
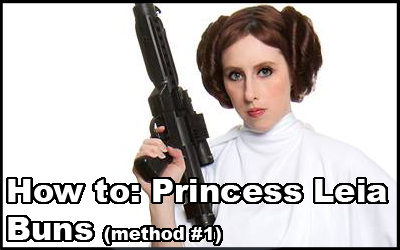
FAQ Friday: Princess Leia Buns – Method 1
(2025 addendum: this method is no longer what I use to do the buns. Head to my Bun Tutorial page for some more up-to-date videos on how I do the buns now.)
So last week I posted “Method #2” for doing Princess Leia Buns (aka, the “donut” version). That method was a quick way to do the buns using what I had on hand, without spending a lot of money, since my regular hair pieces don’t match my hair color very well anymore.
This “Method #1” (aka, “cinnamon bun method”) I’m going to show you today is the way I have done my Leia buns since 2004, and it’s my tried and true method.
My notes for all of these Leia tutorials:
-It’s been a long time since I actively studied these hairstyles – most of my Leia costumes I did 2005-2007ish. I don’t claim them to be 100% accurate then or now! These are just for showing the way I have personally done them.
-There are always other ways of doing these hairstyles, so as always I urge you to research and experiment to see what works best for you! Especially for the classic buns – I’ve seen girls who have made clip on buns, styled wigs, bought and updated pre-made wigs, etc. There’s a lot of different methods out there you can experiment with.
-My extensions no longer match! But that will make easy for you to be able to easily see what is real hair vs extensions.
What you’ll need:

Hairbrush (wig safe)
Wig spray – Mine is home-made – directions here!
Hair bands – 14 at a minimum for my exact method – if you use longer extensions you will need less. I gather each end of my extensions with a hairband.
Lots of bobbie pins – I use 5 different sizes – large for anchoring the ends, medium “normal” bobbie pins, v-shaped hair pins and curved (for my bangs)
Hairspray (optional)
Hair nets (optional)
Extensions – For this method I use 2 or 3 18″ wefted hair extensions per side.
Step 1

So again, here’s what I’m working with. I’ve got pretty long hair, but it is very fine. It’s a butt to work with.
This method can work with shorter hair as well – I used the same method for my Leia buns when I had shorter-than-chin length hair a few years ago. As long as you can get your hair into a pigtail it’ll work, though if you don’t have enough length for Step 3, it can be tricky (but do-able).
I center part my hair, put it into low pigtails (as close to the top of my ears as possible).
Step 2
Next up I get the pigtails damp. I just take a wet washcloth and wipe them down, it makes them easier to twist and stay in place.
Then I wrap a hairband around the ends of my pigtails, looping the ends of my hair back into the hairband, creating a little “handle” of hair at the end. (I actually forgot to do this in these pictures! So it can be done without doing this, but it does help keep all your hair in place for pinning.)

Step 3
Now time to make some baby Leia buns! I start twisting my hair until it twists right up to my head.


Once it’s there, I arrange it into a circular pattern, and pin it into place. This is where I use the most bobbie pins, since my real hair is more slippery than the synthetic hairpieces. Plus you want it to be very secure since it will be the middle of the bun.


(If you got shorter hair, what I did when I had short hair was to get my tiny pigtails pinned down as much as possible so I didn’t have any flyaways sticking out, then continued on with the next steps, just moving them in a bit. It took a bit more fiddling with but it still worked.)
Step 4
Once you’ve got your own hair twisted up into little buns, now it’s the time for the extensions.

I have 6 extensions – I use 2 or 3 per bun. If you wanted to buy longer extensions so you use less all together, you can certainly do that – but I’ve stuck with mine, since I like their thickness, and I also like having 3, because it lets me play with the size and shape of my buns depending on which Leia I’m doing. You’ll get to see what 2 vs 3 looks like in a minute.

I also use extensions that are wefted. While these do have ugly tracks that need to be hidden, I find them much sturdier and easier to take care of than loose hair extensions. What you use is completely up to you.
Before I attach them, I clean them up. I spray them down liberally with my wig spray, then gently brush them out and cut off any pieces that have gotten stretched out and may be sticking out funny. Every so often I also give them a bath – just a rinse off in cold water, let them dry overnight, then brush them out the next day. If need be, you can purchase Wig Shampoo or Conditioner to get them nice and clean as well.
I tie off both ends with hairbands to keep them manageable, again looping the loose ends of the hair back into the hairband to create a hook for the bobbie pins.
Step 5
I take one extension, and tuck the wefted end underneath my own hairbuns, at the back of my head. I try to get it as hidden under my own hairbun as possible. I use my BIG bobbie pins for anchoring this down.

Once it’s firmly in place, I twist the hair as I wrap it around my own hairbun. How tightly you want to twist it is up to you. I pin it in place as I go, and once I’m at the end (which, usually for me, is a couple of inches past where I started), I pin it down, and then repeat on the other side.


One extension pinned in place:

Step 6
Repeat with the next set of extensions. I’ll usually aim this wefted end to be a bit above or below the wefts of the first set. Make sure that, as you are twisting the hair, you are getting it laid where it is hiding the hairbands/wefts – sometimes after you get the piece on and pinned, you may need to go back and rearrange the hair a bit, tug some over an ugly edge and pin it down.

Two extensions pinned in place:

Step 7
Repeat with the last set of extensions.

At this point I will usually grab my phone and take photos of my hair, so I can see that the back is straight, and that the buns are fairly even. It’s easier to tell in photos than by eyeballing it, for some reason.
It’s also time to adjust. Sometimes the last set of extensions need tightened or loosened to make them even, and you may need to move and pin some hair down to hide bands/wefts.
I usually give my head a little shake, and I can feel where it might be loose. I like to use the v-shaped hair pins to hold it all in place around the outside edge.
Now, here’s the difference between 2 extensions and 3 extensions. I usually go with the larger buns for costumes like the Gentle Giant or action figure variations, and smaller buns for conventions or small events. It really doesn’t matter though – her buns change size throughout the movie so you can really go with whatever you like. Plus, 2 can be twisted and pinned a little looser to look bigger, and 3 can be twisted and pinned a little tighter to look smaller. So it’s all just 6 of one, half dozen of another.


And check the back…

Step 8
I use the curved bobbie pins to pin my bangs back (not needed if you don’t have bangs, obviously), then hairspray the whole thing if I feel like I need it. (If I’m going to be outside, that’s usually when I’ll need it.)
2017 Addendum: At the time I wrote this, I had never used hair nets over the bun… I finally tried brown hairnets a couple of years ago and I’m a convert. It helps hold everything together and you don’t get as many flyaways, and really helps create the correct shape. You can “see” them in any Leia photos I’ve posted since 2017. I bought a pack of 100 brown hairnets on amazon for like $10, worth it.
The buns in action…

Visit my other Leia hair tutorials: ANH Leia Method #1 (Cinnamon Bun Method), ANH Leia Method #2 (Donut Method), Ceremonial Leia, Bespin Leia, Slave Leia, Hoth Leia, and Rebel/Endor Gear.


