Lucy Ricardo
Source: I Love Lucy
Made for: DragonCon 2017
Journal Entries: Read more at my Lucy tag
Related Costumes: Nadja, Janet Snakehole
![]()

![]()
 Patterns Used:
Simplicity 5006 (top)
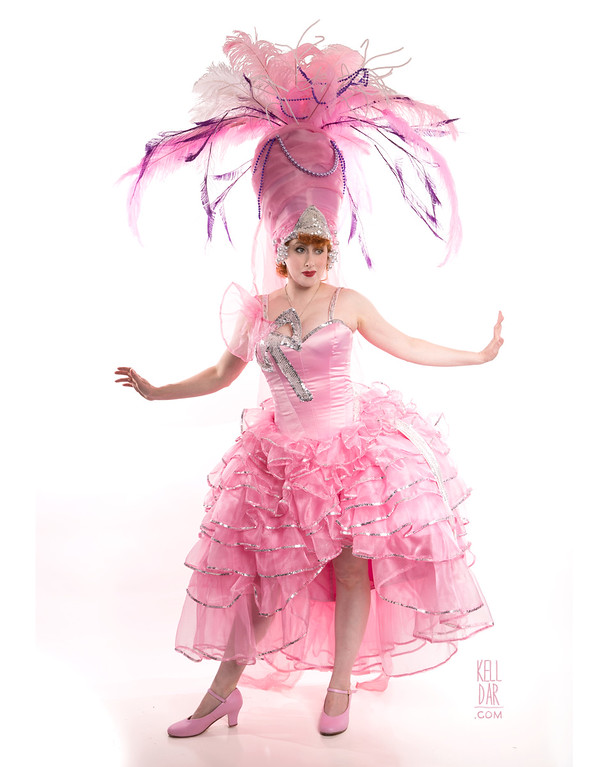
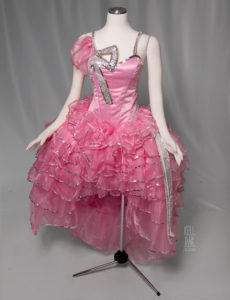
Dress:
So first up I wanted to find some basic pink satin for the base of the dress. I could not find basic pink satin anywhere locally. And I wanted to buy it local because A) that’s just like, so basic why would you buy it online? and B) I wanted to be able to feel it to make sure it was the weight I wanted. So I ended up buying some light pink satin and dyeing it. Ridiculous.
I used the above bodice pattern to make the top, lengthening it a little. I lined it in some leftover cotton and taffeta, put in spiral steel boning and bra cups. (I did end up having to remove the 3 front panels after I put in bra cups that were too small and trimmed the fabric to fit. Had to recut the panels, dye them again and reinsert them with new bra cups. Thankfully it worked out well.) It laces up the back.
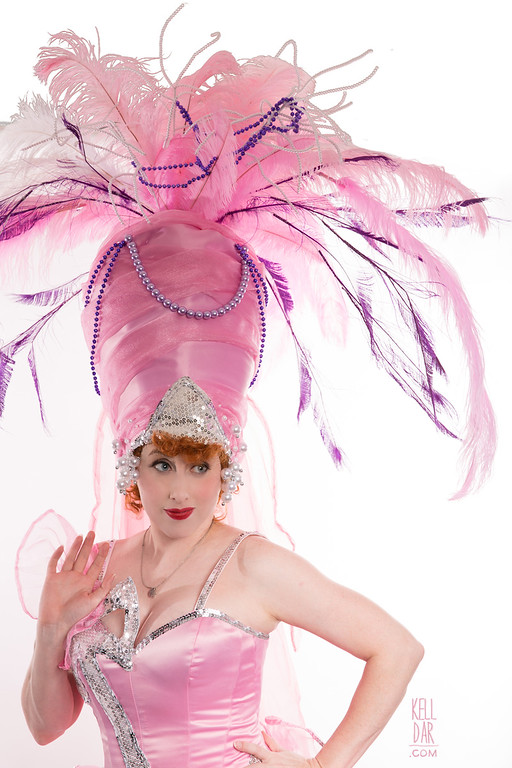
For the sequin appliques, I drew out a pattern, made sure it was sized right, and then cut the shapes out of my leftover satin and a silver sequin fabric. I used the satin as a backing for the sequin fabric, sewing them together, and then hand-sewing them in place onto the bodice. The top part of the sequin “bow” that comes up over the bodice is backed in a heavy felt to reinforce it and keep it from drooping. I trimmed the edge of each of the appliques in my sequin trim so that they’d be extra blingy, and added some loose sequins to break up the pattern of the sequin fabric a little.
I made the straps out of leftover satin and sewed some more of my sequin trim on, and added an organza ruffles to the top right.
For the skirts, I knew I needed a lot of organza. I found a really thin organza I liked online, and ordered a ordered 16 yds. It came and I liked it…. but the more I held it up to my dyed satin, the more orange/peach it looked. So I decided to switch to a different pink – ordered another 16 yds LOL. I was going to try to mix them, but in the end I just didn’t like that “coral” tone and only used it for mock-ups, and I did end up using some of it as the “train/veil” on my headpiece. Still have a ton, I’ll find another use for it.
So for the skirt, I decided I needed to make some pocket hoops. I used the patterns from Jean Hunnisett’s Period Costumes for Stage and Screen book, and some scrap pink fabric and hooping leftover from other projects. They aren’t the prettiest thing I’ve ever made, they’re kinda rough around the edges, but they get the job done.
Once I had that made, I cut a few big rectangles out of my dyed pink fabric, sewed them together, gathered them on the sides, and then trimmed off the excess and hemmed it. (Once I started getting the ruffles on I realized I’d left it a little too long – so I had to go back and cut it down again, and re-hem it.) I got the skirt sewn onto the bodice, and then it was time to make ruffles.

I cut long lengths of my organza in different heights. Each one was hemmed, and then I sewed the silver sequin trim along the bottom edge (thankfully I found a machine stitch that worked for doing this, so I did NOT have to handsew all of that on!). Some of the ruffles I machine gathered, some I hand-gathered. A few of them I pleated. Just depended on where the ruffle needed to go on the skirt, how much width I needed to take up, and how I was feeling that day 🙂 The top two ruffles I sewed together, then hand-sewed them into place on the skirt – at that point it was too much work to wrestle it into the machine, and the top of the skirt was coming dangerously close to the boning channels on my bodice – so hand-sewing was easier.
Once that was done, I tried it on, and realized I needed one more ruffle along the bottom – that pretty much used up the last of my organza except one long, thin strip – I saved that for the wrapping on my headpiece. Nothing else was leftover!!
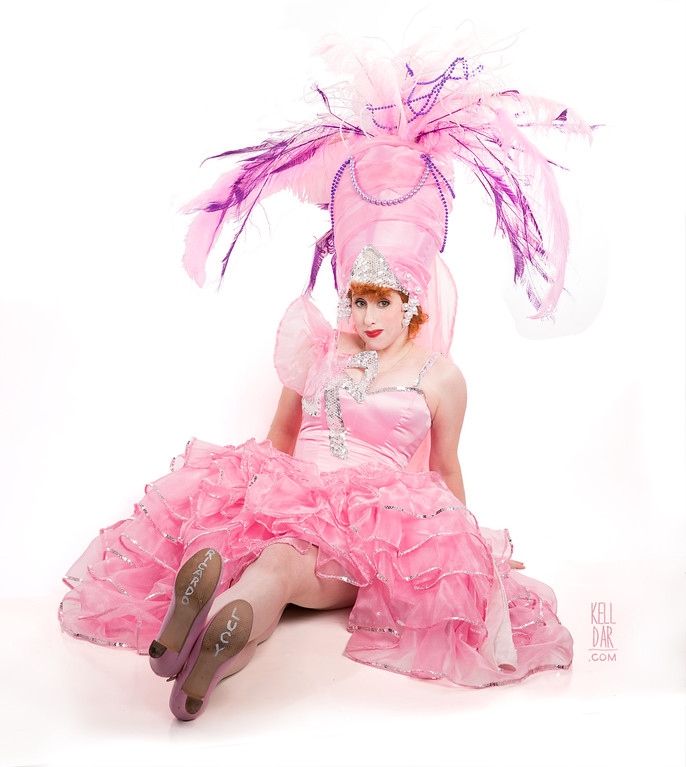
Lastly, I made the two “ribbons” that hang down the front of the dress, out of my silver sequin fabric backed in satin. I just handsewed those into place in between the ruffles.
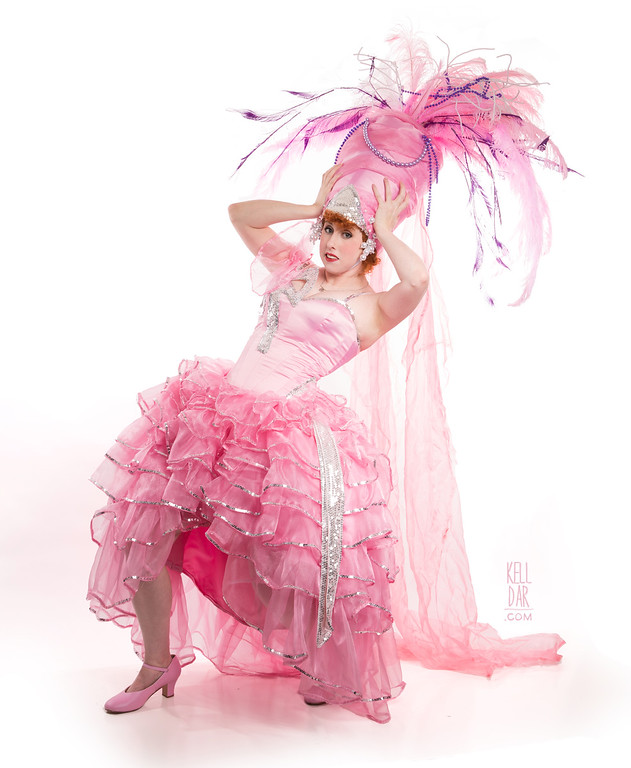
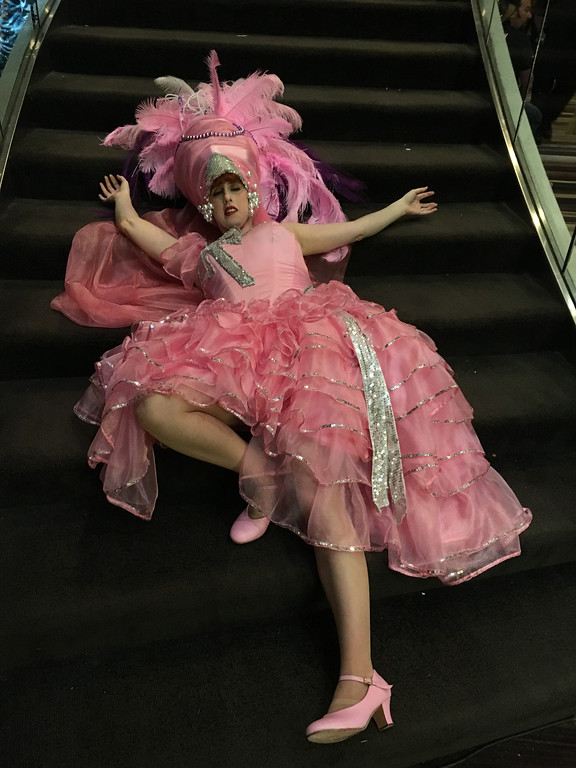
Headpieces: Ok so this headpiece was a pain in the butt. It caused my first pre-Dragoncon costume meltdown in years. (I thought I was too old for that!)

I decided I wanted to build it around something, and I found a giant crown – just a cheap Halloween costume piece. It came and I cut off all of the decorations and excess, and it looked like it would work pretty well. I built a hooping frame in the interior – just two pieces criss-crossed and sewn into place at the base, so that it wouldn’t want to collapse once I started adding stuff at the top.
Then I made a cover for it using my dyed pink satin. Once I had that on and sewn in place, I made a long tube out of my leftover organza, hand-tacked it in place onto the headpiece, and then I made another silver sequin applique for the front. It was at this point I realized – it’s too tall. I didn’t think “too tall” would ever be a problem, I thought I was going to keep running into “too short.”
So I had to take it apart, and I decided I’d just cut the crown in half, remove some of the length, and sew it back together. Well it didn’t work right away, and I thought I was going to have to buy another one and wait a week for to get here and I had the aforementioned meltdown. But after leaving it alone for a bit and thinking it through, I went back to it and got it sewn back together, a little shorter now, got my pink satin cover taken in and put back on, and got the organza strips and applique back in place.

After a few try-ons, I realized that my silver applique in the front was a little wonky and offcenter. So I took it off, cut it down, and recentered it, also added some of my sequin trim along the edge. For the “earrings” or pearl decorations on the sides, I bought some big pearls at Joanns, and strung them onto some thin silver elastic, along with some small silver beads I had on hand. Once I had a group of about 6-7 of these strands, I tied the tops of them together and sewed them onto a small piece of felt. Then I sewed that piece of felt into the inside sides of the headpiece. I also added a few loose pearls sewn onto the headdress around it.
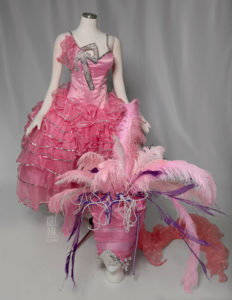
Now at the top of the crown I used as a base, there was originally a little gold bobble. When I cut that off, it left a decent sized hole. This worked out perfectly – I left a similar sized hole in the top of my satin covering, so I could access the interior of the headpiece from the top. Initially, I tried to build a small foam base into that hole (the grey foam I use in wigs), but that was not working well. So I switched to green floral foam – I found some “bouquet” shaped foam pieces at the hobby store that fit into the opening PERFECTLY. I bought 3 of them since they did get worn out with feathers being put in and taken out constantly. Having it like this allows me to completely remove the foam piece pretty easily – with or without the feathers on it – so I can take the whole thing apart easily to either pack, or to negotiate crowds/elevators.

So for the feathers, I bought a ton of feathers online. Mostly pink ostrich, mixed some white in there, and got some smaller purple ones for the “dangling” ones. I wired most of them onto some long white floral stems to reinforce them, and for the big droopy ones, I took my five biggest feathers and wired some of the smaller ones onto it, to make them look a little bigger. The “dangling” purple ones, I wired 3-4 of my small purple feathers onto the floral stems, worked ok. I wrapped electrical tape around the bottom of the floral steams to keep them from tearing up.
Now she had a few of these large, sparkley things in head headdress – Chase and I started calling them “antlers” for lack of a better word. I found some pearl sprays in the wedding section of the hobby store that ended up working pretty well. I bought a pack of purple mardi gras beads (and one strand of some bigger, nicer purple beads), and sewed them around the headdress, and I packed a few to drape from the antlers once we’re at the con and I can reassemble everything in the room.
Lastly, I took a piece of my unused coral organza and used that for the train. The long sides are the selvage so I opted to not even hem them – though I did hem the top and bottom. Then I just hand-sewed it into place on the headpiece.

Shoes/Accessories:
I bought a pair of nude “character” shoes on amazon, and I painted them pink using fabric paint. (Took about 3 coats for full coverage). Then I used a white paint pen to write, “Lucy” and “Ricardo” on the bottoms of them.
My wig was a cheap “Mad Hatter” wig I bought off amazon – I just put it up into the “poodle” look. No one was every supposed to see this wig except for a few curls at the edges – but eventually the headpiece got too heavy so I wore it without the headpiece for a while at Dragon Con. I think I’m going to get a nicer wig for the future – because I think I’d like to make the smaller headdress she wears later in the episode as well one day.
History:
I had an issue with the headdress listing backwards at Dragon Con. Turns out that the stuffing I thought I didn’t need – I did actually need. I’d initially kept it stuffed with polyfill while working on it, but I thought the hoop skeleton would be enough to keep it upright – I took the stuffing out and didn’t bring it to Dcon. After Dcon, I put the stuffing back in for the photoshoot and it worked perfectly – no more listing. So listen learned – don’t change things up at the last minute.
![]()


![]()


Please note that none of these costumes are for sale! This is my personal portfolio.